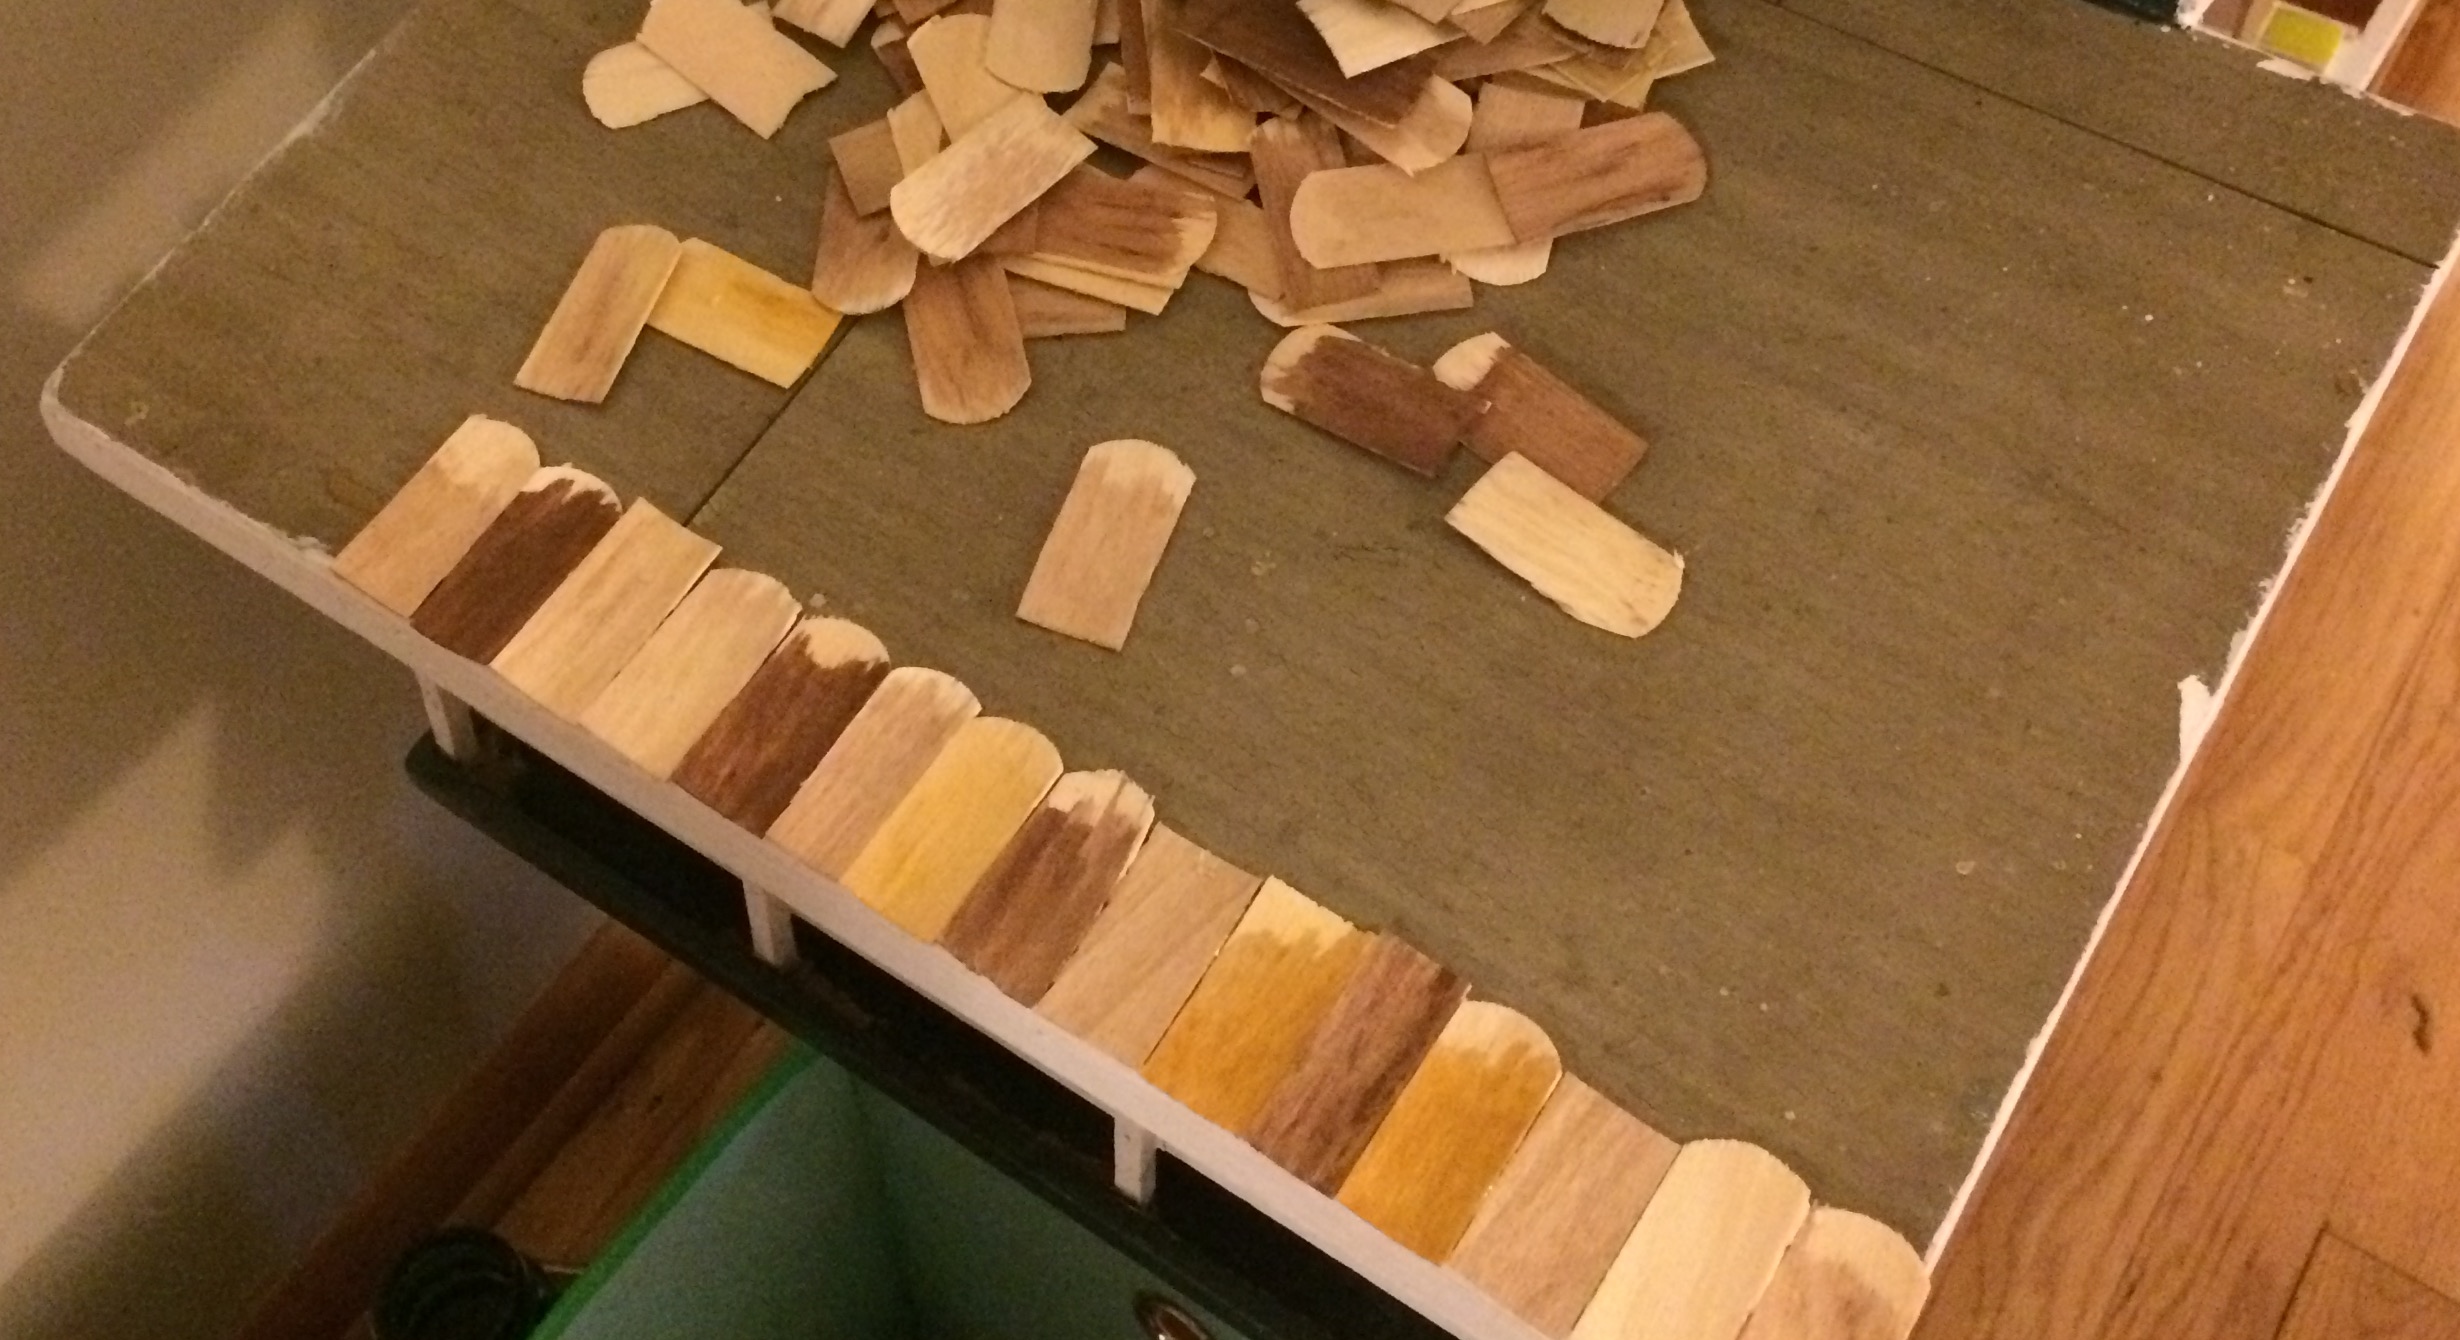
Here’s a look at how my shingle installation is going.
Step one: Paint a bunch of shingles, let them dry.
Start your installation at a bottom corner, as shown.

The first shingles going into place. Photo by Holly Tierney-Bedord. All rights reserved.
Some of these are fishscale shingles, more appropriate for a Victorian style house. You can use them with the rounded part buried under other layers, as I’m doing. I actually prefer them to the rectangular kind because the scalloped edge seemed to keep them from curling a little.

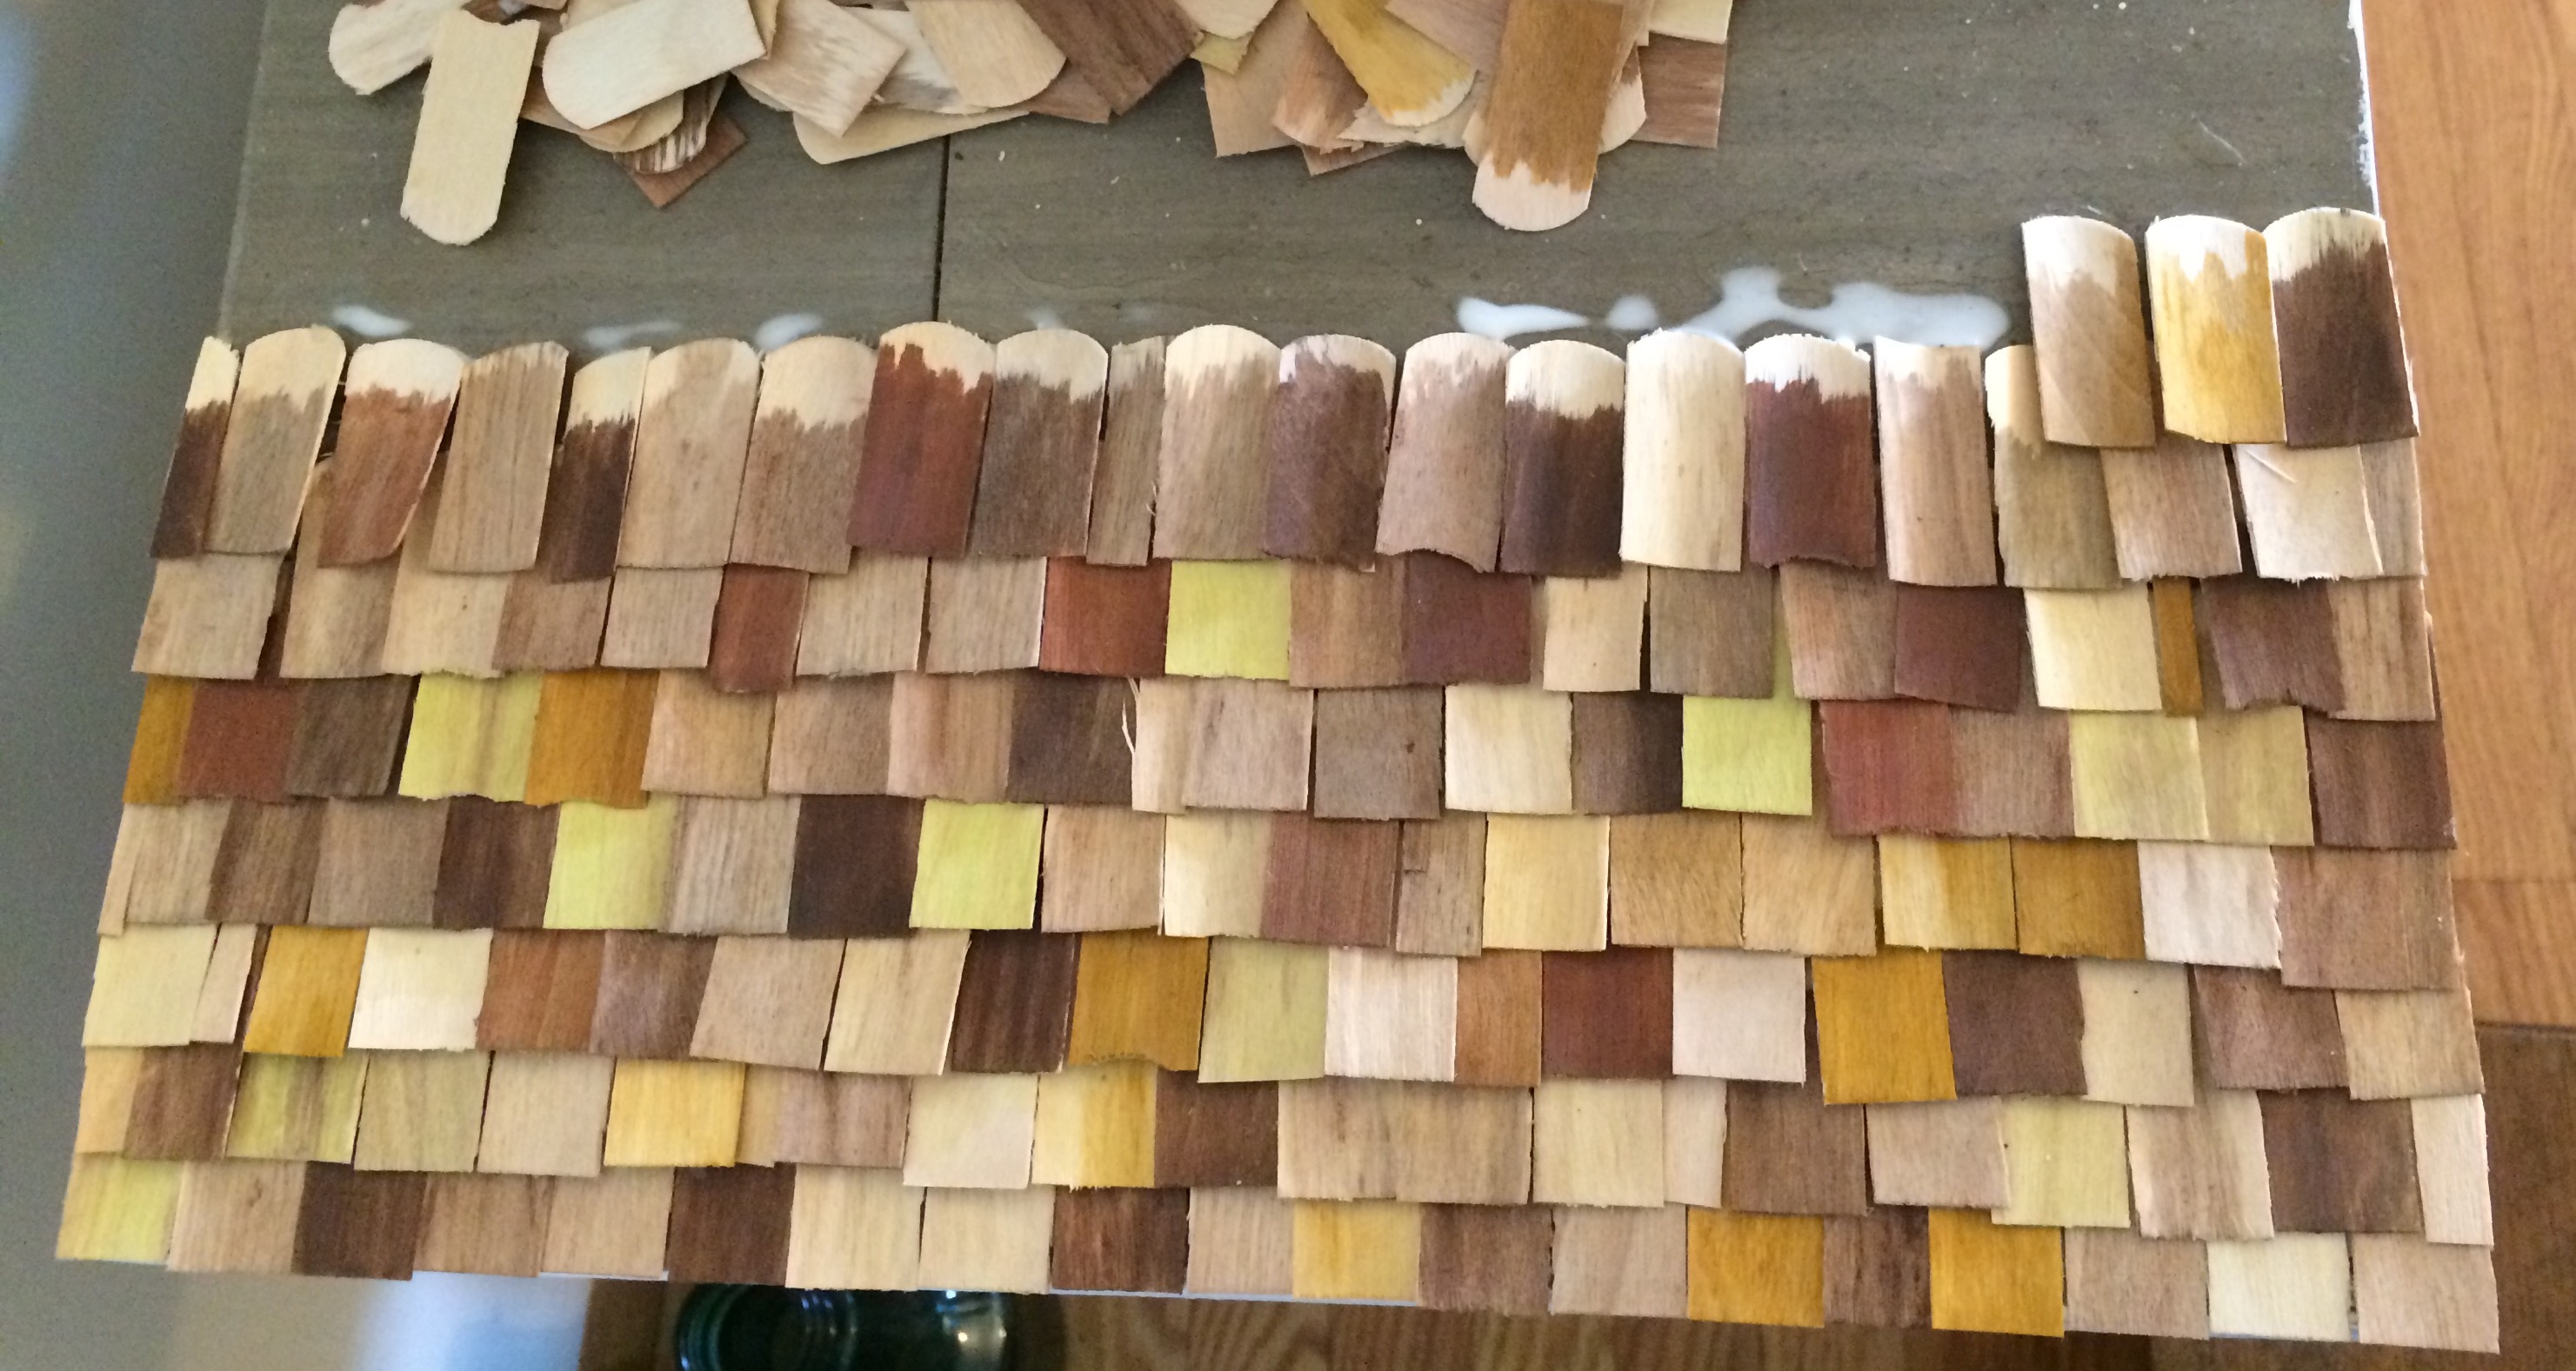
When you start your next layer, stagger these shingles. This means you’ll break a shingle in half, and start your row with it, so your seams do not line up, the way real shingles are layered.
If you have a variety of colors going on, like I do, be sure to mix them up.
If a couple of your shingles seem to be glued into place too low, you can carefully trim off a bit to even them up.
Drawing lines on your roof ahead of time as a guide would probably make the job easier.
Here’s where I’m at right now. I’m almost done with the carport. I have a lot of roofing ahead of me. Too bad I don’t have a cooler full of tiny beers.