The master bedroom has been wallpapered!

Furniture and decor I've purchased

After recently debating between a bunch of different wallpaper choices (using scrapbook paper, not actual wallpaper) here, the master bedroom has been wallpapered! I ended up choosing something completely different from the samples I showed you a couple of weeks ago. As I’ve mentioned, one of the designers inspiring me on my house flip is Jonathan Adler. I thought what I ended up choosing had that fun, “Happy Chic” feeling I was seeking, but it actually looks a little more on the childish and maniacal side of things than I’d intended. The good thing is, if I choose to take it down, at least I can use it for templates for the next sheets I install in that room.

Wallpaper. Photo by Holly Tierney-Bedord. All rights reserved.

Wallpaper. Photo by Holly Tierney-Bedord. All rights reserved.

I think I will give it a couple of days and try it with furniture, just to see if it grows on me in a good or bad way. What do you think?

Slowly but surely…

Flipping my mini house
A look at my mini kitchen and dining area. Photo by Holly Tierney-Bedord. All rights reserved.

A look at my mini kitchen and dining area. Photo by Holly Tierney-Bedord. All rights reserved.

I finally got my breakfast bar removed. It turns out it was screwed into place. Once I figured that out I was able to remove it without breaking it, which I was really excited about since I thought it was such a cute feature. I’ll drill new holes for it and it will get moved a little closer to the bench in the dining area, so my kitchen will be a little bigger than it used to be.

The little bit of flooring that remains is coming out one little chip at a time. I almost cut my thumb off the other day when I was trying to watch an old episode of Survivor and work on my house at the same time. All I can say is, I’m glad this is dollhouse flooring and not something I’m dealing with on a larger scale.

I’m not sure what, if anything, I can do about the fact that the floor swoops down a little towards the carport. I didn’t notice it so much at first, but when you’re sitting on the floor, staring at it for an hour, it starts to become really obvious.

Speaking of the carport, I was able to get the wall propped back up to be straight. So that’s great news.

Here’s a reminder of how my house looked when I first got it:

Day 1 of my mini house. Photo by Holly Tierney-Bedord. All rights reserved.

Day 1 of my mini house. Photo by Holly Tierney-Bedord. All rights reserved.

The exterior is now dark teal. Also, I’ve decided the exterior trim will be a yellowish color to match my West Elm measuring cup planters. Photos of that coming soon!

Free printable template to create a mini vintage ornament box

Handmade decor for my mini house

A few weeks ago I shared the mini ornaments I made here, along with the tiny box to store them. I said I’d be sharing a free, printable template so you could make your own ornament box. Here it is. Sorry it’s after Christmas, but better late than never, right? This box can be scaled up or down a little to accommodate different size ornaments. You could also use it as an starting point to create tiny doughnut boxes, dress boxes, game boxes, etc.

To form the base into a box, cut it out along it’s exterior border, and fold accordingly. Snip the sides just to the second line. These four little tabs you create by doing this will hold the other sides in place, once they’re folding around it. It sounds confusing, but once you cut it out and play with it you will see what I mean. You won’t need to use glue for the base of the box since it will hold itself together fairly well once it’s folded, but you can use a dab of glue if you want, just to be safe.

For the lid, use an Exacto knife to cut out a small viewing window. Ideally you should fill that window with a piece of clear acetate for a finished look. Glue it together using a glue stick.

Mini ornaments by Holly Tierney-Bedord for Flip This Mini House blog. All rights reserved.

Mini ornaments by Holly Tierney-Bedord for Flip This Mini House blog. All rights reserved.


Shiny ornaments box designed and created by Holly Tierney-Bedord. Free to be printed and used for personal use and not for financial gain. Not to be sold or distributed without my written permission. All rights reserved.

Shiny ornaments box designed and created by Holly Tierney-Bedord. Free to be printed and used for personal use and not for financial gain. Not to be sold or distributed without my written permission. All rights reserved.

Making the ornaments is easy and inexpensive, but tedious. You’ll need just beads, wire, wire cutters, a pliers, and some kind of scrolly metal detailing like you see dressing up the top of my ornaments. The wire and metal doodads should be the same color. Just stick the wire into the doodad and bead, and use the pliers to make a little loop at the top and little bend at the bottom, then clip off excess with the wire cutters. Be careful that a piece of wire doesn’t fly in your face or land someplace where you’ll stop on it. That’s about all there is to it. It’s an easy project that just requires a little patience.

Choosing wallpaper for my mini master bedroom

Flipping my mini house

There’s going to be a lot of wallpaper in my mini house. A LOT. Like every room. Since it’s a mini house, I’m going to pile on all the crazy things I wouldn’t want to live with in my real house. (Or in some cases, the things I would want in my real house, but don’t have the energy or money to make happen.)

I’ve been thinking about wallpaper for the master bedroom. Here are several choices:

This slideshow requires JavaScript.

Originally, the second picture (green flowered) was what I had in mind. However, now I like the sparkly chevrons and the fireflies (# 9) best. Sparkly chevrons was intended to go the bathroom, in part because it’s got some texture to it and the walls in there a mess from having had tiles glued to them at one time. I love number ten, but at some point my house is going to stop reading mid-century modern if I’m not careful. I think that could be detail that takes it from mid-century with quirky touches to just plain wrong.

I’ll have to think about this.

Which do you prefer?

Inspiration and tiny decor items lurk everywhere

Everyday objects repurposed

When I’m in the creative zone it’s kind of hard to shut it off. At any given time, I have ten (or twenty, or thirty) different projects swimming in my head. From books I’m writing to houses online I’m dreaming of buying to my imaginings of going on Project Runway (even though my sewing talent level is more on par with Threads), I’m always dreaming about my next creative endeavor. Lately my mini dollhouse is on my mind quite a bit and I find inspiration everywhere. Example: What do you see here?

Bodywash. Photo by Holly Tierney-Bedord. All rights reserved.

A.) Some bodywash on a bookshelf

B.) Something out of place. Is that still wet? It might leave a mark. Maybe you should have set it on a coaster or something.

C.) A disposable bottle and a cap that looks like a tiny, modern bowl.

If you said A, you are a normal person. If you said B, you might be a little bit neurotic. If you said C, let’s take a closer look!

Bodywash cap. Photo by Holly Tierney-Bedord. All rights reserved.

Ooh! Look at the lovely curving lines of this bottle cap. And the rich, gold color. If I flipped it over and ripped off the top I’m sure it would look something like this…

Mini modern cap/bowl. Photo by Holly Tierney-Bedord. All rights reservede.

This is going to make a great little holder of mini fruit, mini balls of yarn, mini magazines, mini plants, and other items. What did I tell you? Tiny decor truly can be found anywhere if you simply look a little closer.

Mini modern bed and pom pom accented bedding

Handmade decor for my mini house

Inspired by modern miniature beds like this, I have created a bed for my miniature master bedroom. The frame is made of part of a picture frame and some thumb tacks. The mattress is made of a piece of Styrofoam covered in quilt batting. It is a work in progress. I plan to give it another coat of paint and maybe add a headboard.

The sheets, comforter, and pillows are made from a fabric remnant, a curtain, and some mini pom pom balls. Since the master bedroom is not that big, this bed will be the focal point of the room. You may recognize the LOVE pom pom pillow from a project I started several weeks ago.

Hits and misses on the road to design

Everyday objects repurposed

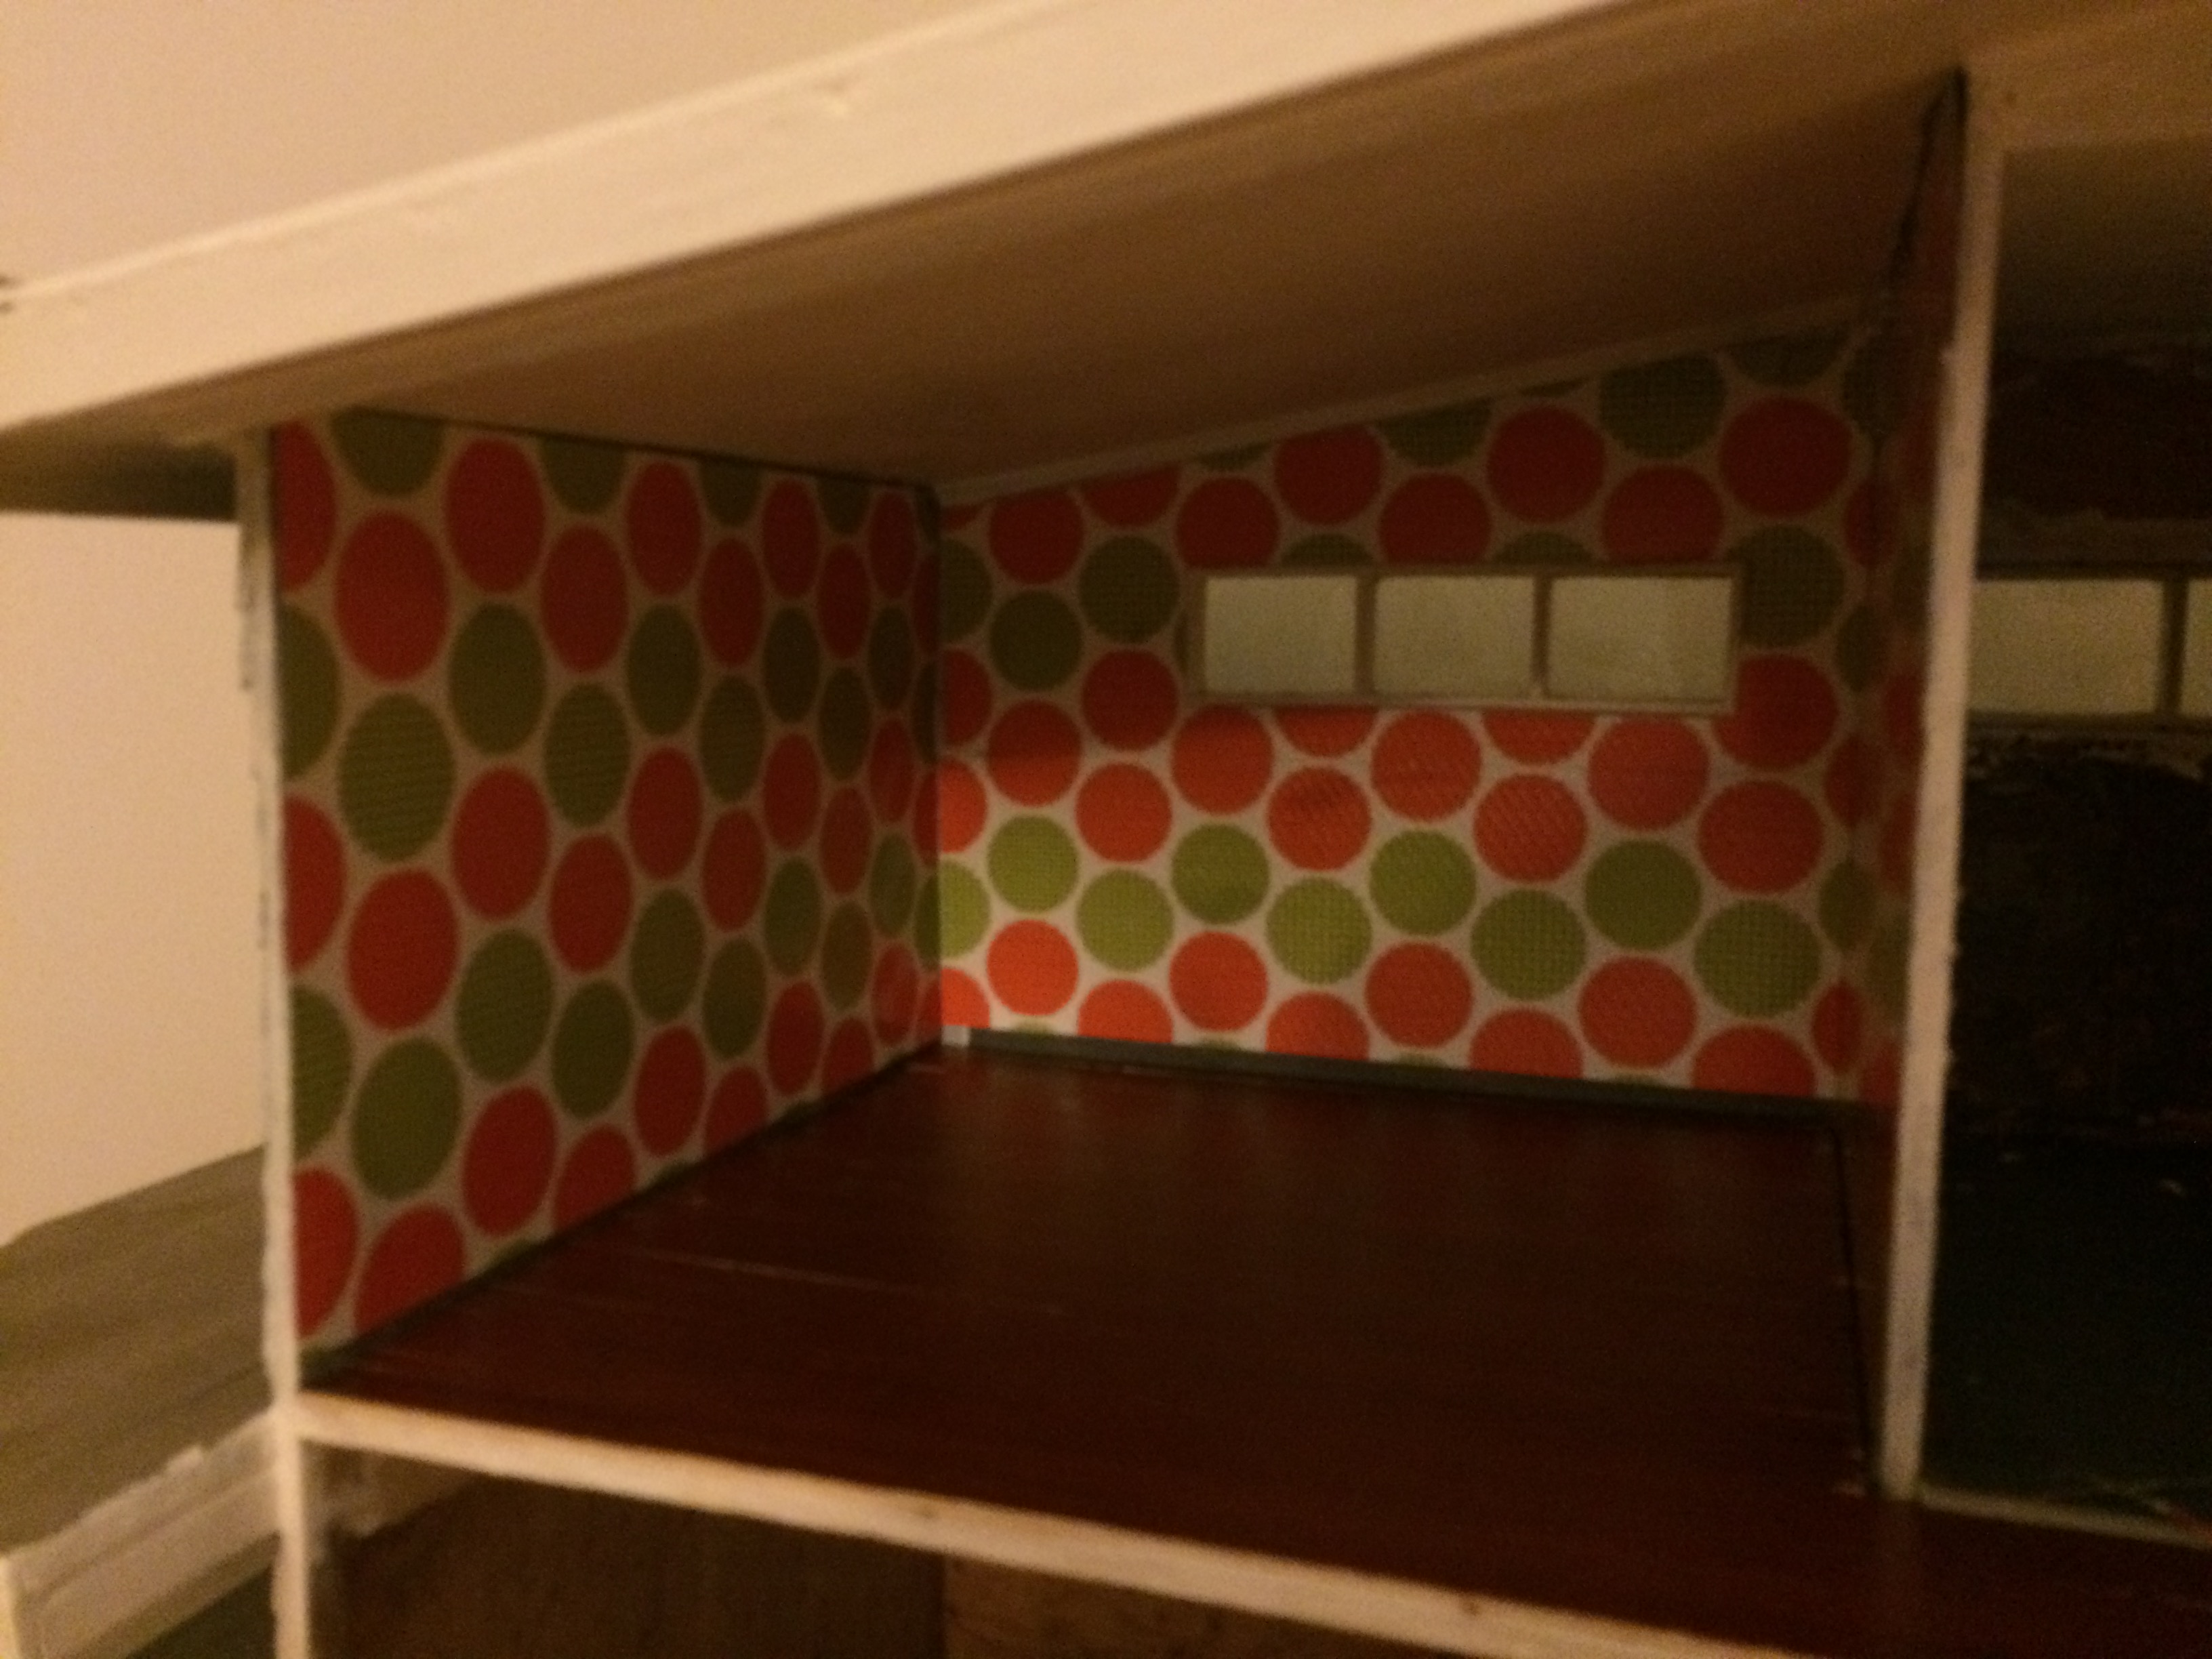
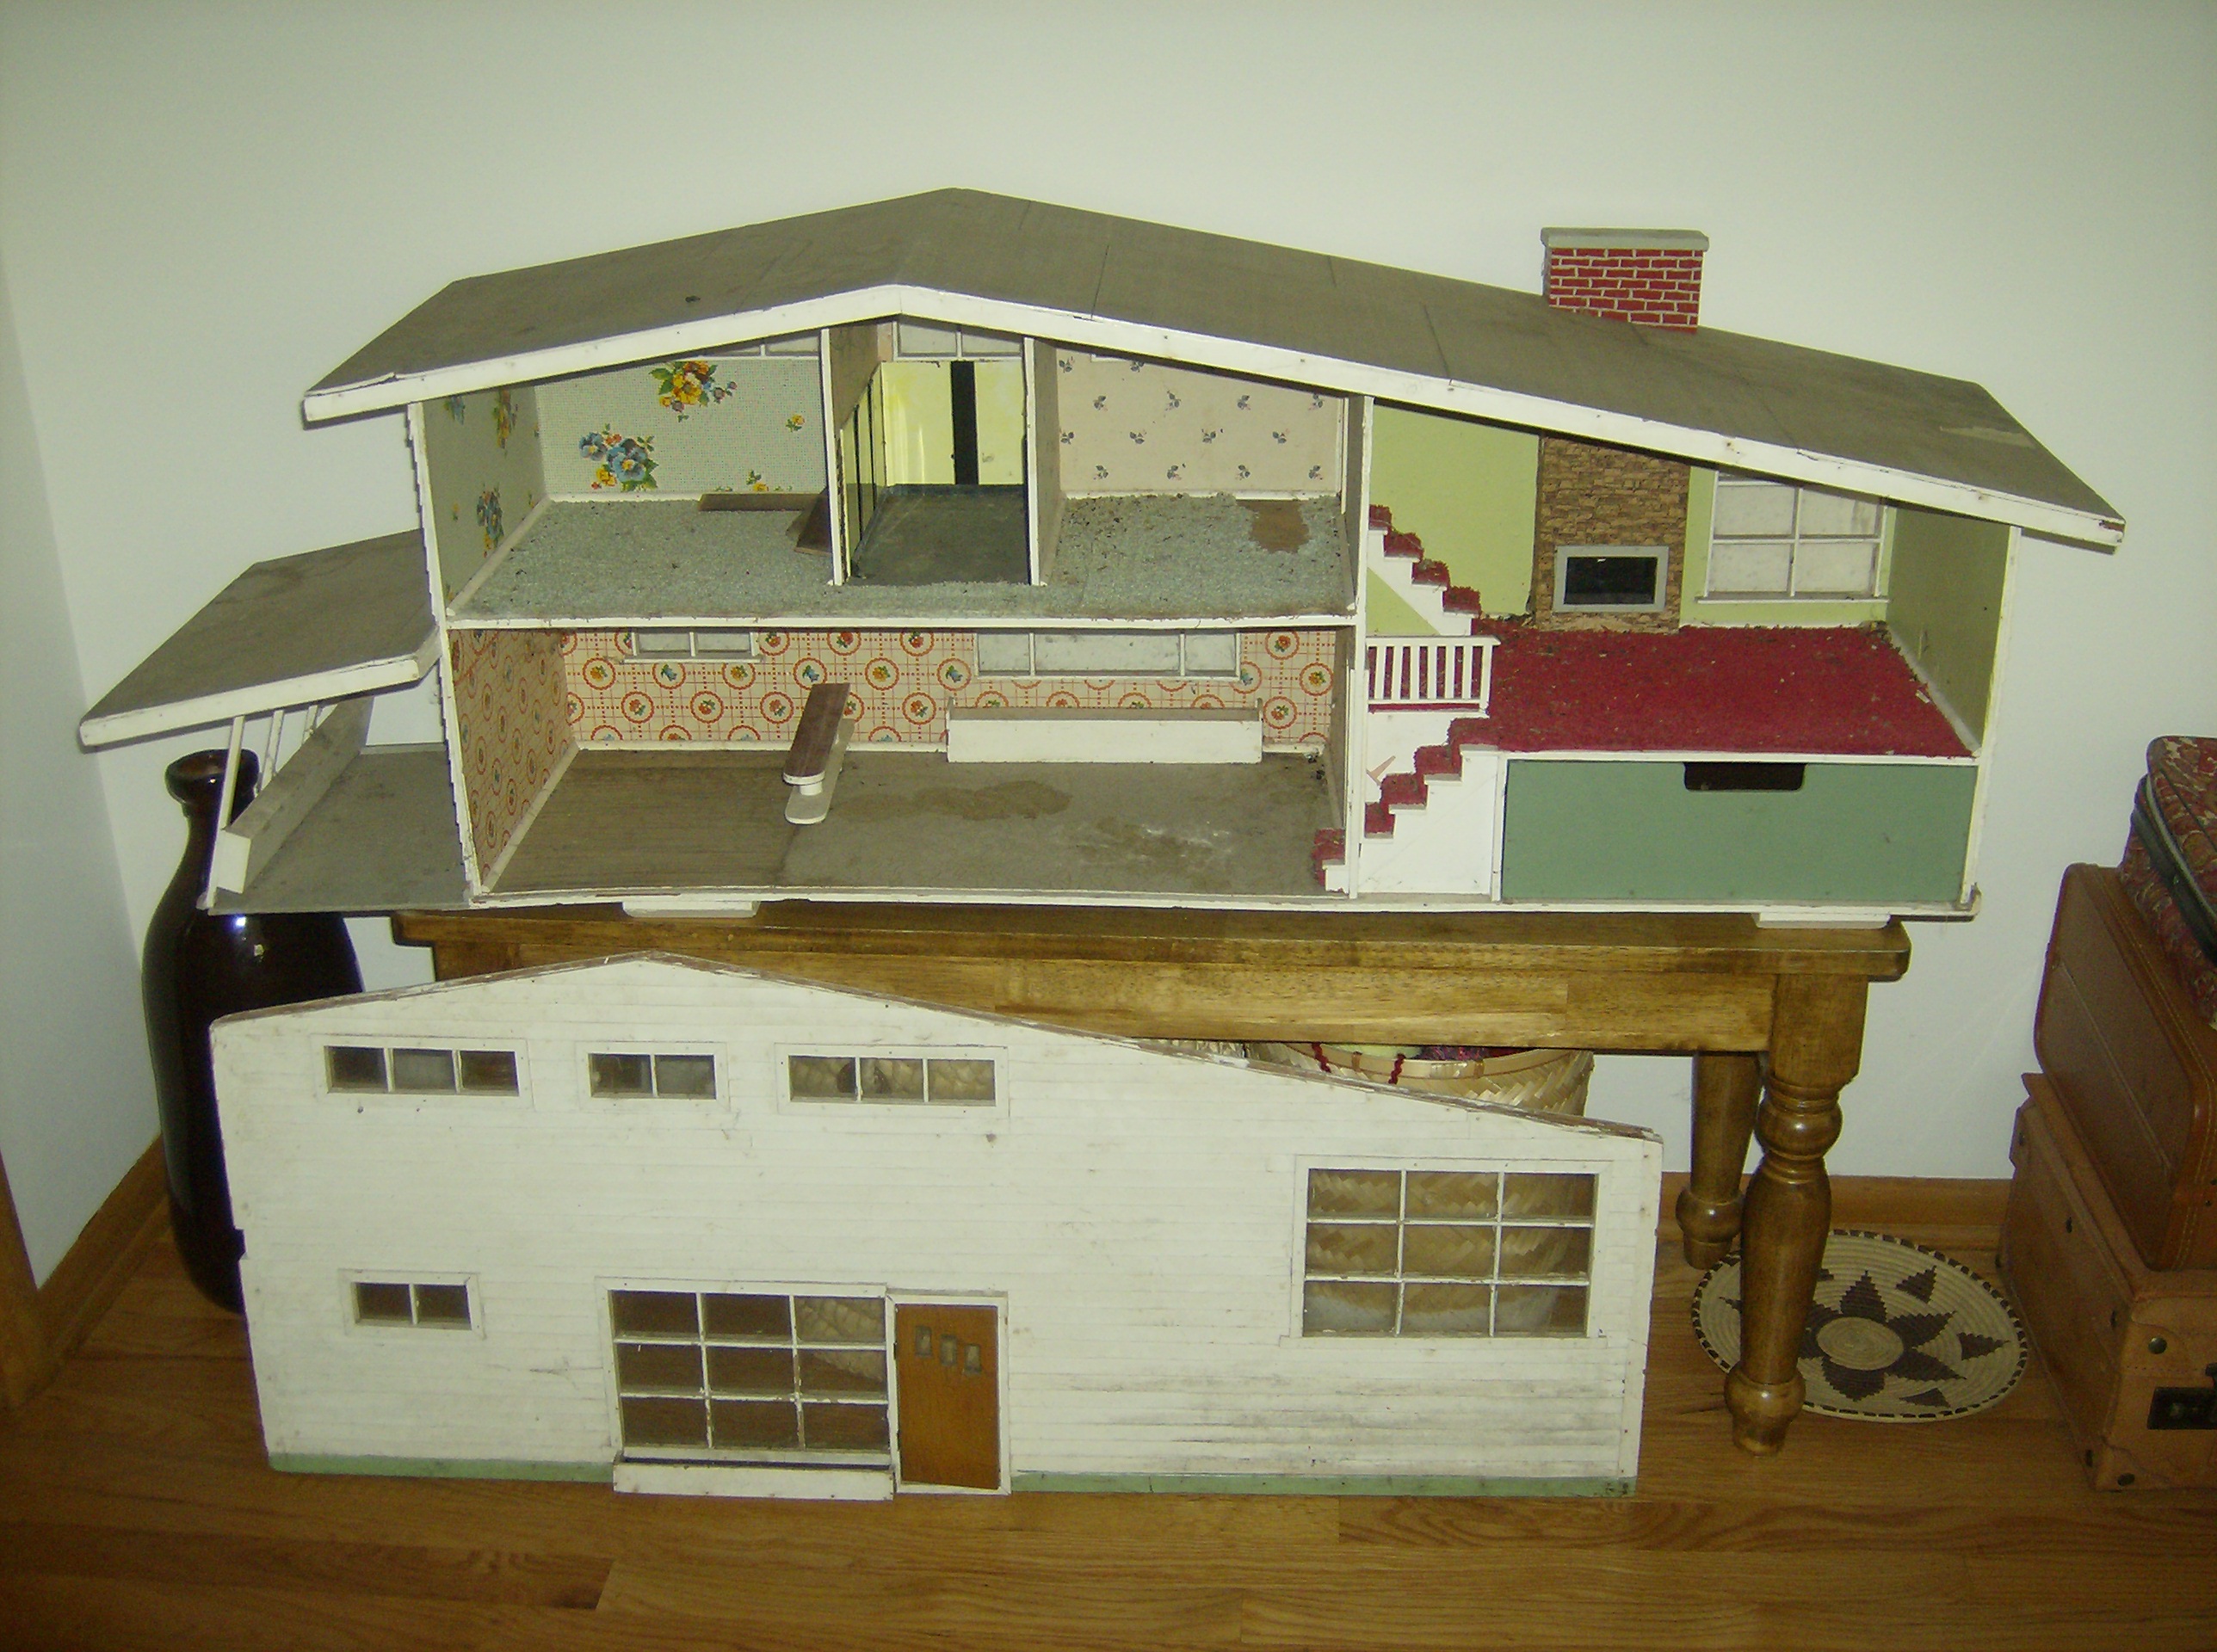
I’ve created a little staging area on the dining room table (My husband really appreciates stuff like that) since my mini house is thoroughly under construction. It’s filling up with the little maybes and probably-nots I’ve been creating.

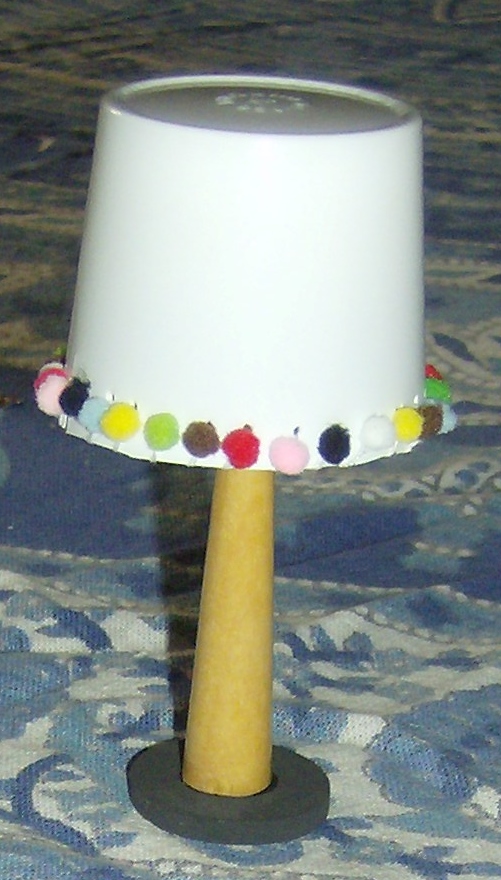
Whenever a person embarks on any creative project there are hits and misses. My dollhouse project is no exception. This (non-functional) lamp made from a Keurig individual coffee serving and some wooden doodads, for instance, looks a little bit more like its components than a lamp. A little chain hanging down might help, but maybe not enough. I’m still debating its ultimate destination, be it in my mini house, or in the trashcan.
Lamp made from a Keurig coffee serving. Photo by Holly Tierney-Bedord. All rights reserved.
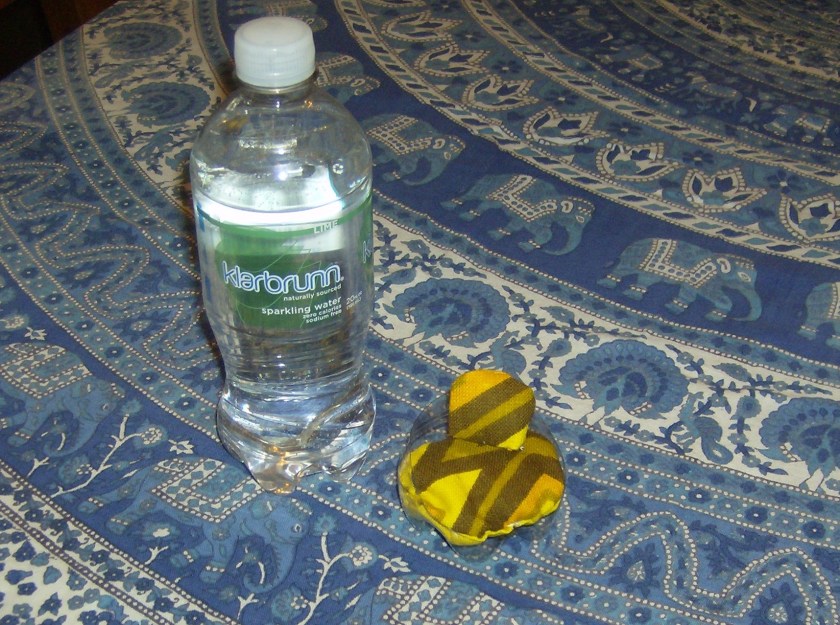
I’m up in the air about whether I am going to keep the modern plastic chair I made from a Klarbrunn bottle. I’m not sure if it reads more as a modern chair, or more as the bottom of a bottle.
Hit or miss? Klarbrunn bottle turned modern chair. Photo by Holly Tierney-Bedord. All rights reserved.

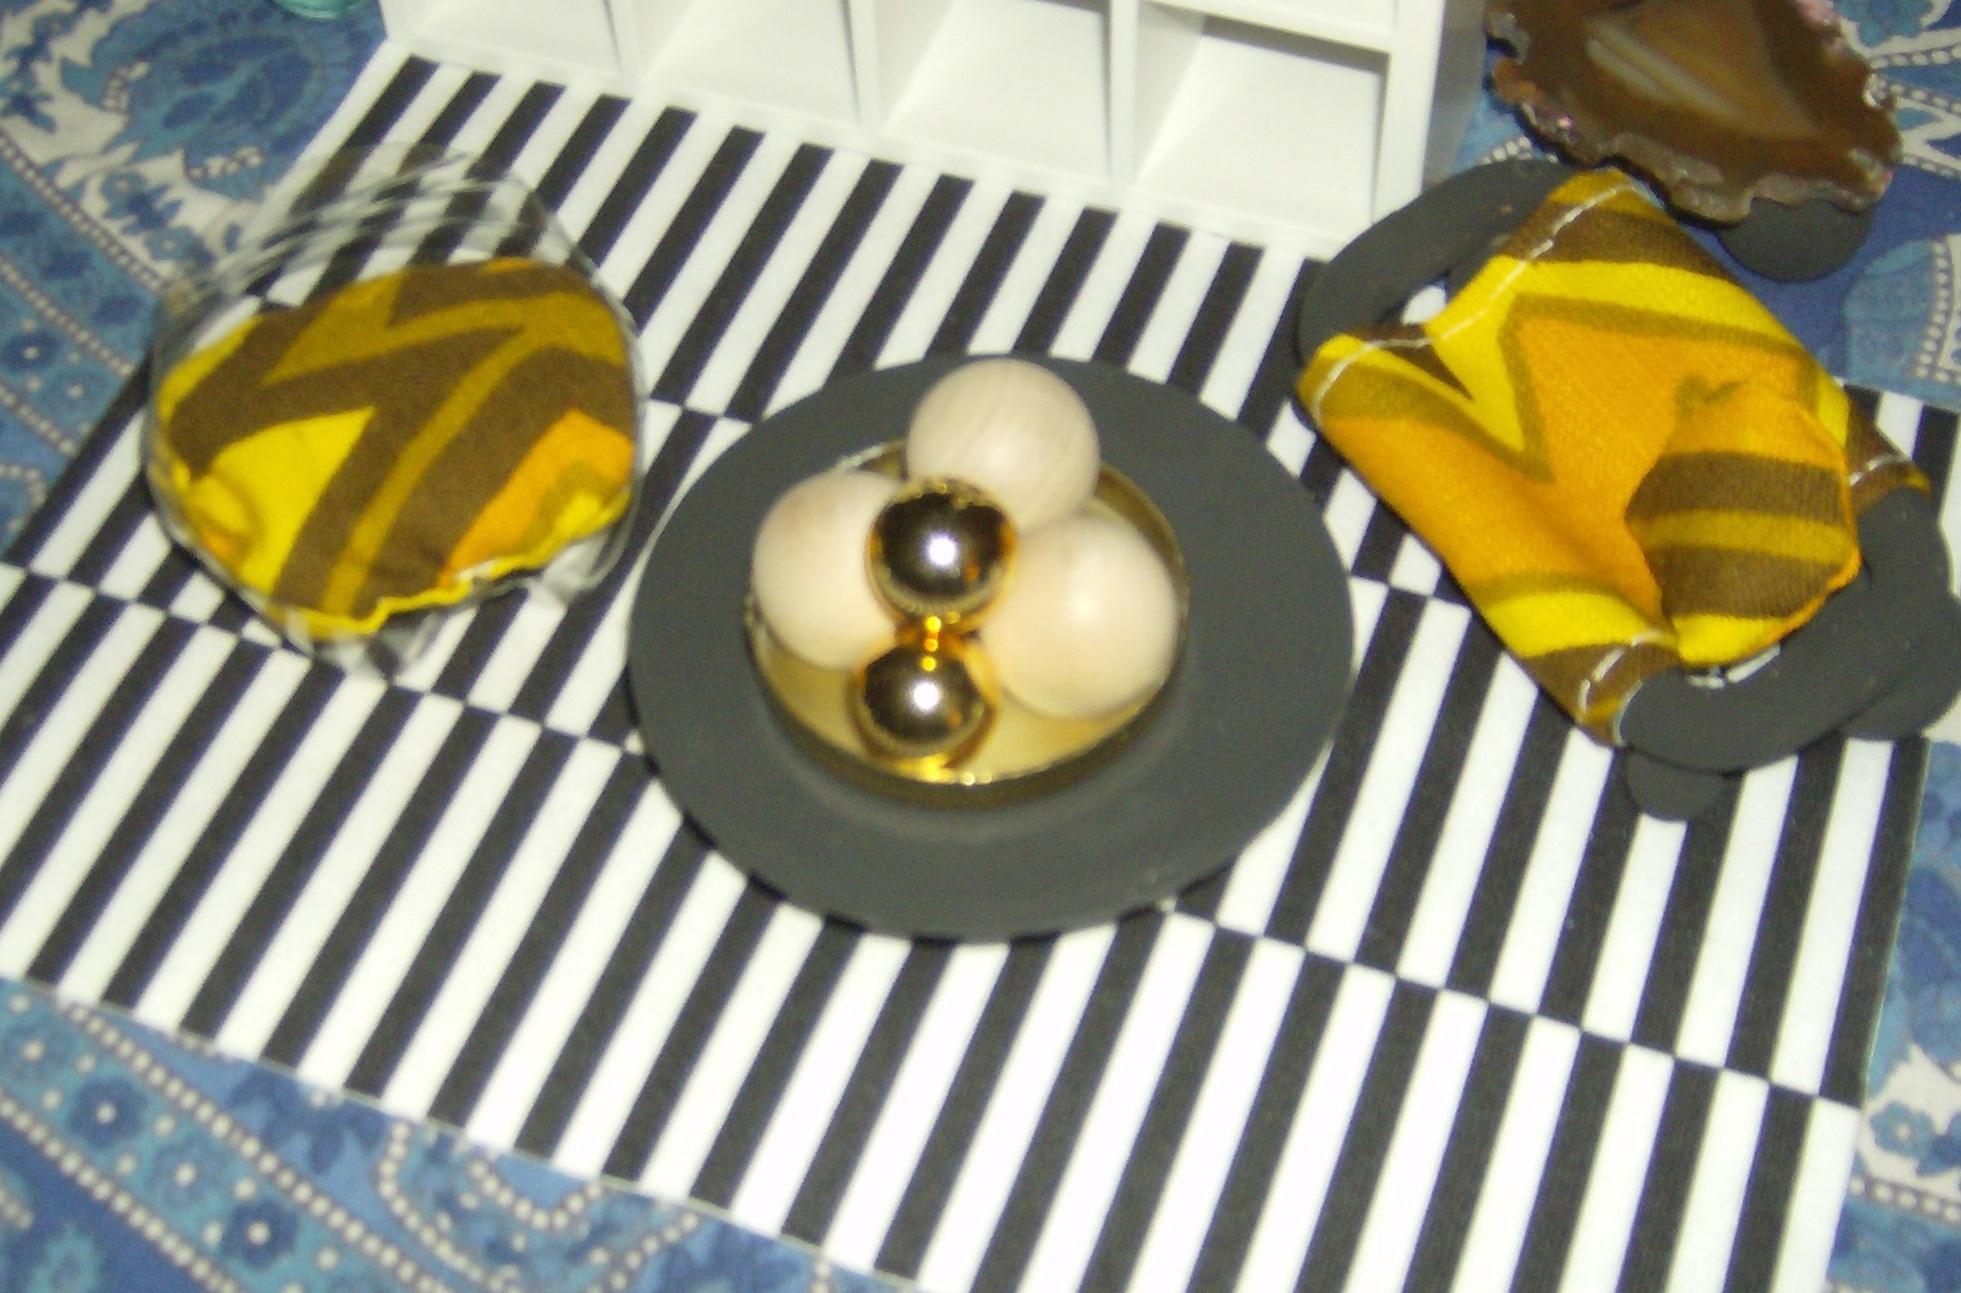
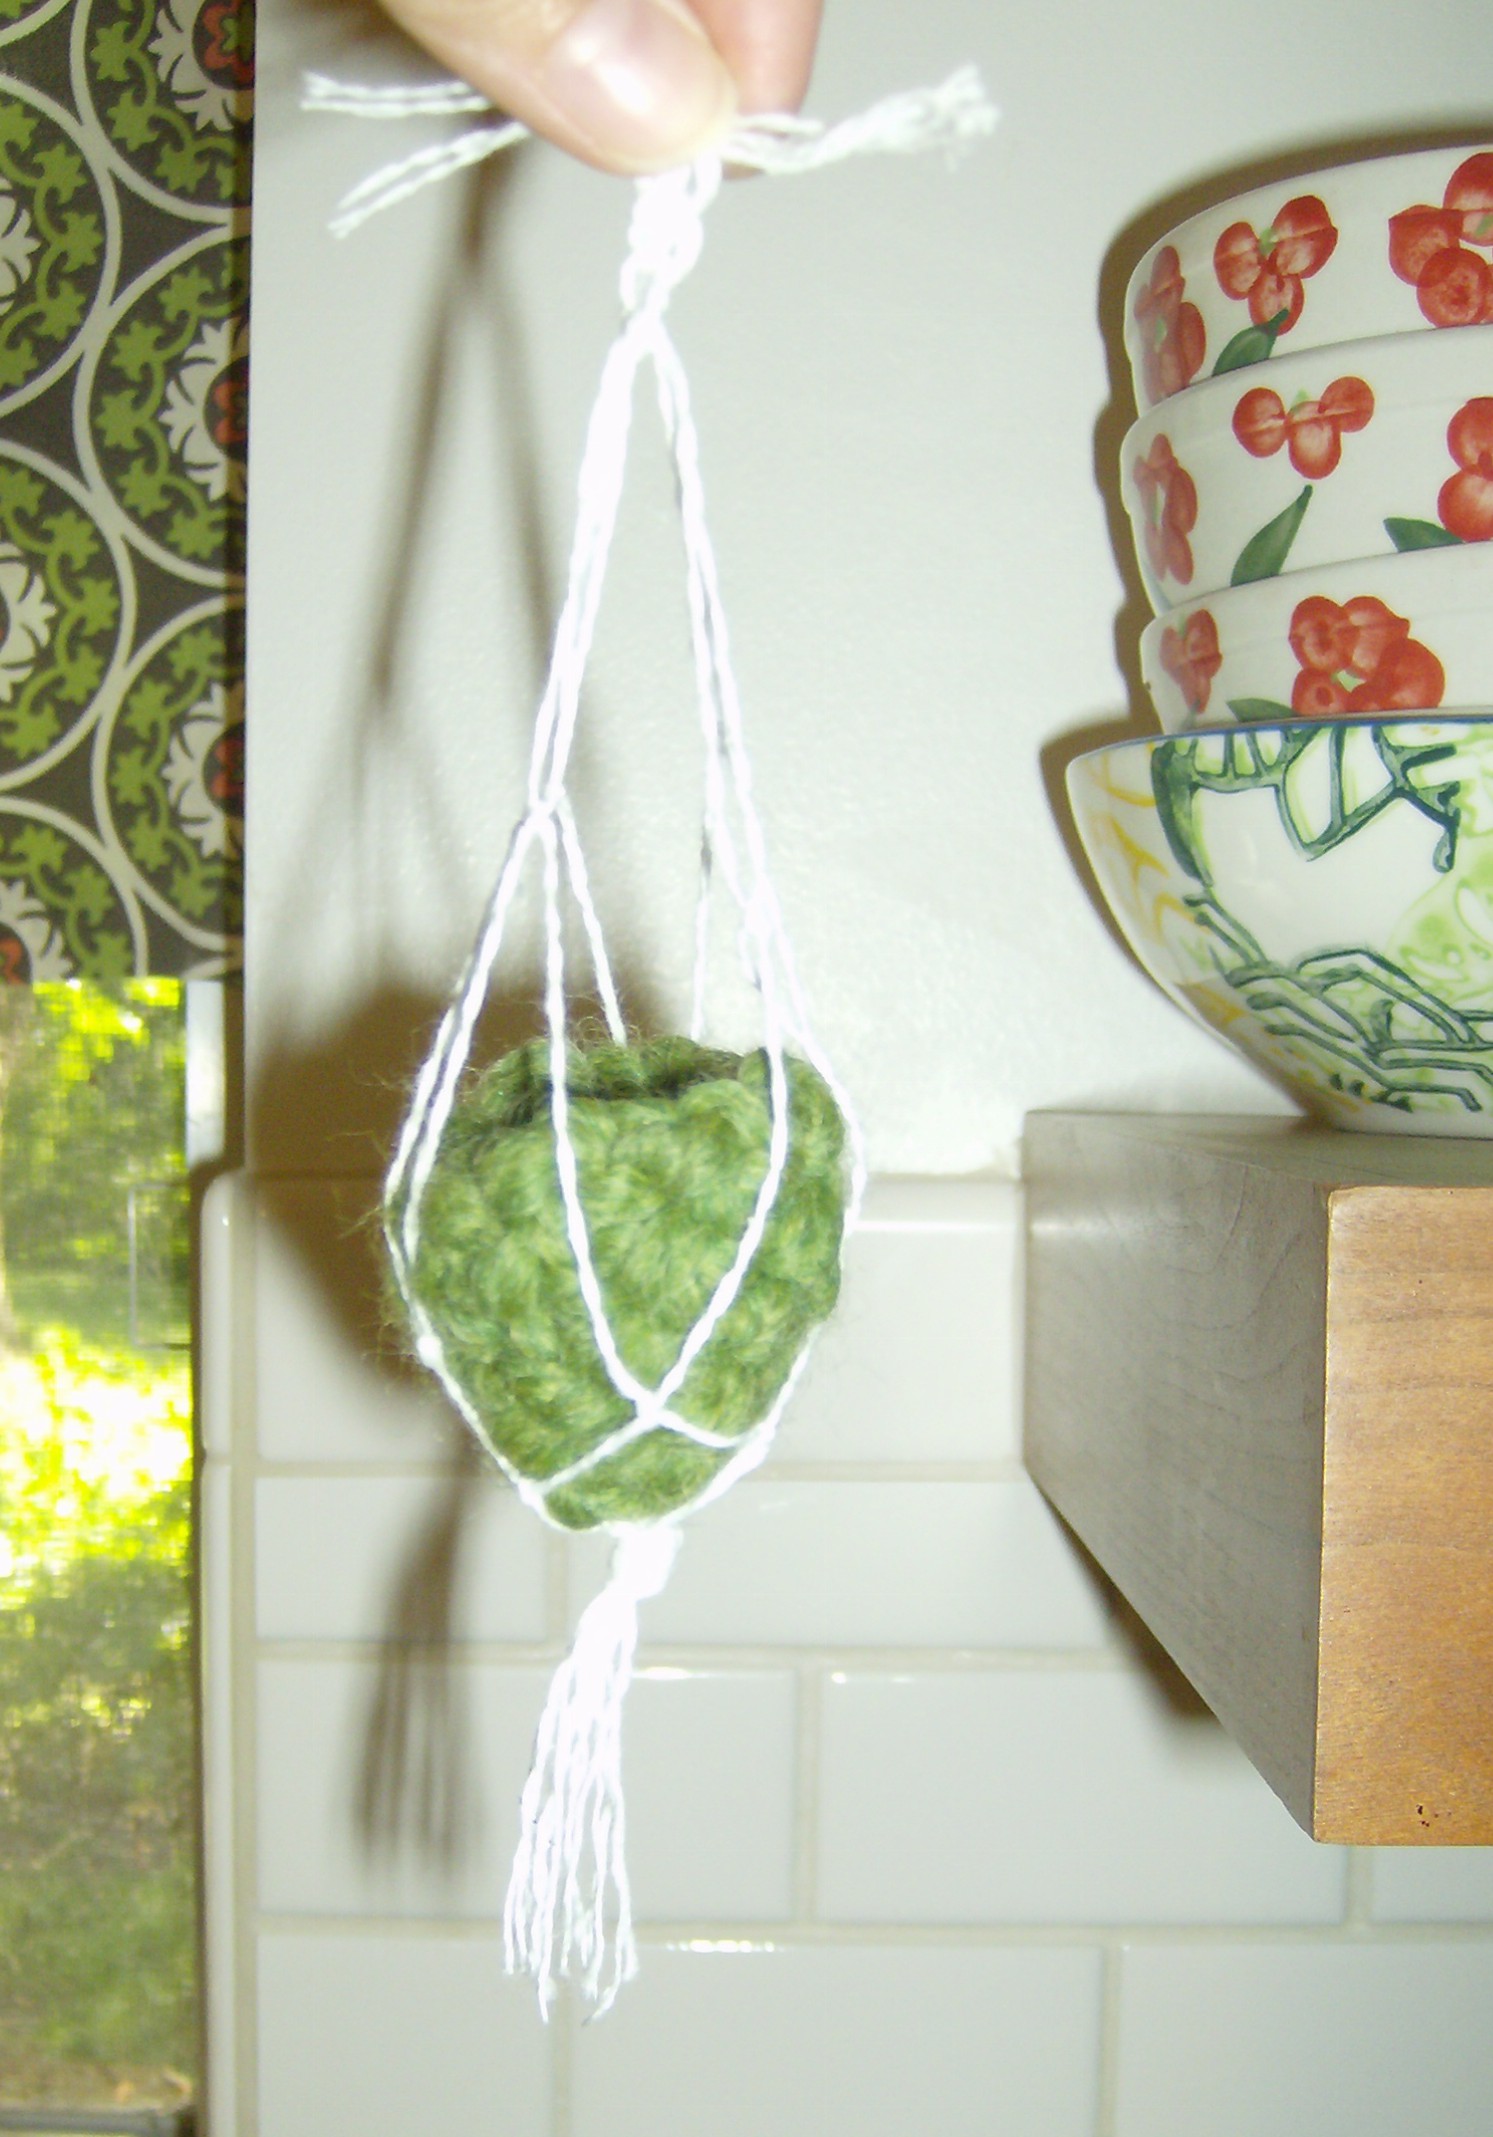
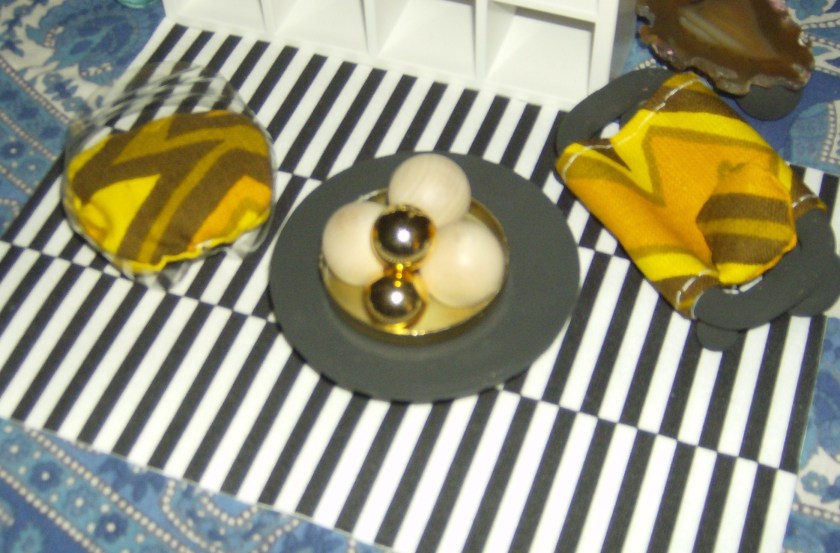
Since people seem to like to decorate with bowls of balls orbs, I decided this would be a realistic addition to my mini house. Inspired by this design element in my own home as seen below…

… I used the shiny lid of an Anthropologie candle as a tray, and filled it with wooden beads, and these shiny brass buttons I recently picked up at a garage sale.

A card of shiny, old buttons. Photo by Holly Tierney-Bedord. All rights reserved.

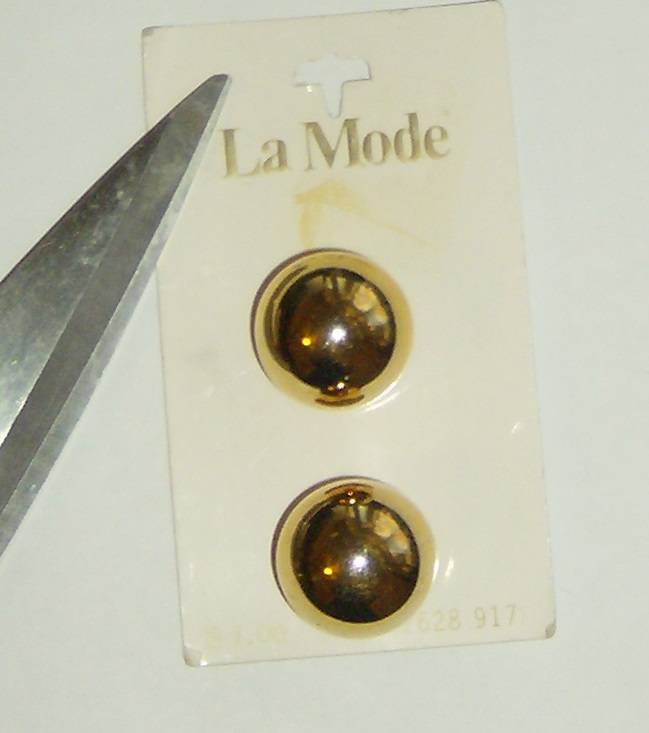
The result is a little tray of decorative orbs, much like you’d see in a real living room:

Photos by Holly Tierney-Bedord. All rights reserved.

Photos by Holly Tierney-Bedord. All rights reserved.

I think this works pretty well and will probably end up in the finished product.

The coffee table I showed you here now has a matte black top, like much of my other furniture. I might repaint it all glossy. I thought the flatness would be a nice juxtaposition to the shininess of the brass that will be in the room, but I’m not sure I’m loving the look.
The bookshelf and rug you see here are Ikea Huset miniatures, as seen here. The shelf is definitely going to be in my finished dollhouse. I’m still debating about the rug.

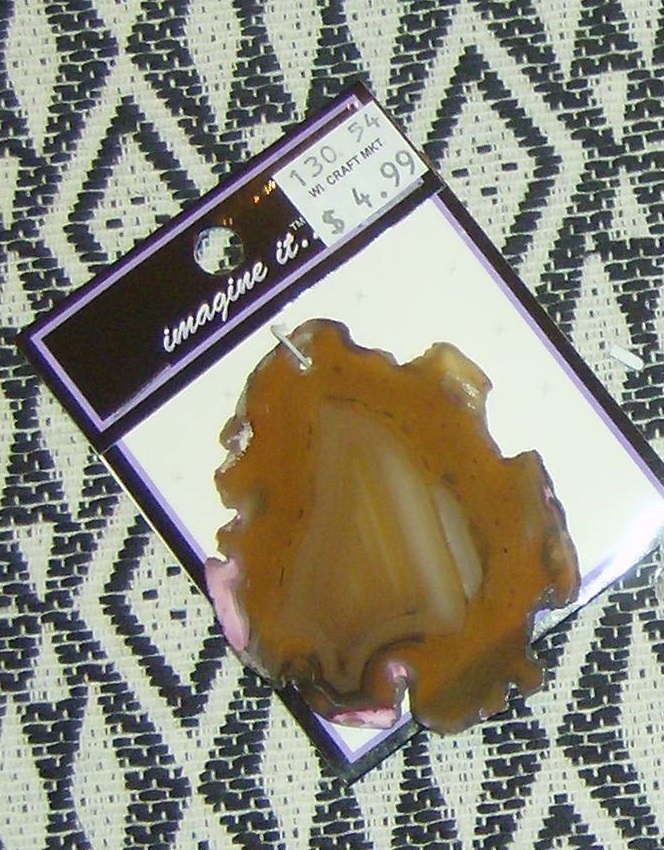
I had the highest of hopes for my end table with a geode slice top. At $5 for the geode slice, it was a big splurge, and I thought would make a really amazing table. However, I am not loving its look or tippiness. I think I need to remove the wooden ball base and glue four little legs on. More about that later. I still know it’s going to be great.

Big splurge! Photo by Holly Tierney-Bedord. All rights reserved.

The little staging area helps me see if the varying, imperfect scales are working together. I knew early on that I was not going to be a stickler about precise scale, in part because my dollhouse itself has scale issues, with some doors being one scale, others being another, but also because I think embracing this quirkiness makes it look more fun in the end, and more fun to work on during the creative process.

When you see the finished house, however long from now that is, I think several of these elements will have been altered or edited out completely. Taking a step back to evaluate, and not getting too committed to bad ideas makes for a better finished product. This is true or writing, design, and unfortunately, I’m afraid, that lamp.

Exterior painting in progress!

Flipping my mini house

A decision has been made. After much hemming and hawing, I’ve chosen this shade of deep teal and given my house its first coat of paint. To get the perfect shade, I mixed it myself using a variety of tubes and bottles of art and craft paint. Here is a little peek at the secret formula:

The magic ingredients. Photo by Holly Tierney-Bedord. All rights reserved.

The magic ingredients. Photo by Holly Tierney-Bedord. All rights reserved.


Final product. Photo by Holly Tierney-Bedord. All rights reserved.

Final product. Photo by Holly Tierney-Bedord. All rights reserved.

I tried to make a lot since matching that color is going to be really tricky. Still, I didn’t end up with nearly enough. I’ll mix another batch soon on a bright, sunny day so I can have the best chance of getting a close enough match.

Here is a look at my house now. It’s splotchy and definitely needs another good coat, but you can see how cute it’s going to be. I’m still debating on trim colors. I’m considering leaving the front door alone and just adding a cute doorknob, and maybe some mid century miniature doodad like this backplate.

New exterior color. Photo by Holly Tierney-Bedord. All rights reserved.

New exterior color. Photo by Holly Tierney-Bedord. All rights reserved.

To remind you, here is the ‘before’ version of my house:

Photo by Holly Tierney-Bedord. All rights reserved.

Photo by Holly Tierney-Bedord. All rights reserved.

Here is a view of just the front panel of the house now:

Photo by Holly Tierney-Bedord. All rights reserved.

Photo by Holly Tierney-Bedord. All rights reserved.

When I’d gotten to the point where I barely had enough paint left to continue, and I was losing my enthusiasm (especially on the side with the carport), I got reinspired by this artwork on HGTV:

Frozen HGTV art inspiration. Photo by Holly Tierney-Bedord. All rights reserved.

Frozen HGTV art inspiration. Photo by Holly Tierney-Bedord. All rights reserved.

I realized that the wall inside what will be the office needs a little art, so I made this mural using a Sharpie marker and some of my leftover paint:

Mini mural, step one. Photo by Holly Tierney-Bedord. All rights reserved.

Mini mural, step one. Photo by Holly Tierney-Bedord. All rights reserved.


Future office. Photo by Holly Tierney-Bedord. All rights reserved.

Future office. Needs some art. Photo by Holly Tierney-Bedord. All rights reserved.


Mini mural, painted. Photo by Holly Tierney-Bedord. All rights reserved.

Mini mural, painted. Photo by Holly Tierney-Bedord. All rights reserved.

Having accent colors inside the house that match the exterior will make the finished project look much more cohesive.

While I still had my paint and paint brush out, I painted the seats of these clearance chairs to match. I’m not even sure if I’m going to use them in the house since they aren’t much of a style match, but they might work someplace.

Mini chairs before. Photo by Holly Tierney-Bedord. All rights reserved.

Mini chairs before. Photo by Holly Tierney-Bedord. All rights reserved.

Mini chairs and mini mural. Photo by Holly Tierney-Bedord. All rights reserved.

Mini chairs and mini mural. Photo by Holly Tierney-Bedord. All rights reserved.

The mural will get cut down to fit on the wall of the office. The chairs will get sanded a little and… who knows.

Coming up soon: Another coat of paint, trim to be painted, shingles to be applied, and chimney to possibly get a facelift. It’s exciting times in Flip This Mini House land!

Tiny cologne bottles, repurposed as large glass bottles and vases

Everyday objects repurposed

Bill’s been incredibly helpful lately, dousing himself in all the cute stocking stuffers he’s acquired over the years, in the name of tiny design. Here are couple of examples of cologne bottles that are about to repurposed as vases and bottles in my mini house:

This slideshow requires JavaScript.

This slideshow requires JavaScript.

A cute little plant holder

Handmade decor for my mini house

Here is another quick, practically-free mid-century miniature project:

Tiny crocheted pot and thread macrame plant holder by Holly Tierney-Bedord. All rights reserved.

Tiny crocheted pot and thread macrame plant holder by Holly Tierney-Bedord. All rights reserved.

I am on the hunt for a leafy little plant to put inside. I think this will likely end up in the bedroom, since it matches the little comforter I made for the bed.