I’ve got some Big News for you! Flip This (Mini) House is now a book!

A new house flipping project, Flipping my mini house, Miniaturists, Uncategorized

Hello! It’s been a while since I’ve had any house-flipping news for you, but I hope this makes up for that!

Flip This (Mini) House is now a book!

It’s available in paperback or Kindle versions.

flippcobr2

Inside, you’ll find all kinds of tips, templates, befores-and-afters, hits and misses, and the whole Flip This (Mini) House story. Much of the information in the book has appeared on this blog, but there is new content as well.

Over 100 full-color photos guaranteed to inspire you and bring out your inner miniaturist! Grab your copy today!

Advertisement

The decorating never ends

Flipping my mini house

Just like with a real house, decorating the Flip This (Mini) House project never ends. The living room, which I just highlighted earlier today, has gotten a make-under. The bubble chair has been swapped with the Eames lounge chair and ottoman from the house’s upstairs office. The fluffy white rug has been swapped out with a carpet from the house’s storage drawer. Ahhh! That’s better!

A make-under for the living room

A make-under for the living room


A make-under for the living room

A make-under for the living room


A make-under for the living room

A make-under for the living room

Flipping the roof

Flipping my mini house

It’s time for shingles to get glued into place and the world’s ugliest mini chimney to get a facelift. Stay tuned!

Chimney before. Photos by Holly Tierney-Bedord. All rights reserved.

Chimney before. Photos by Holly Tierney-Bedord. All rights reserved.

Debating between small teal shells to match the exterior paint color, or tumbled river rocks…

Chimney before. Photos by Holly Tierney-Bedord. All rights reserved.

Which did I choose? I’ll tell you soon!

I’ve been getting lots of work done!

Flipping my mini house

My mini bathroom is really coming along! The tile floor has been grouted, trim has been installed, the sparkly chevron wallpaper has gone up, and the mini blinds I made from a coaster are now on the wall. Here’s a look at all the progress:

Progress in the mini bathroom. Photo by Holly Tierney-Bedord. All rights reserved.

Progress in the mini bathroom. Photo by Holly Tierney-Bedord. All rights reserved.

As a reminder, here are some before photos:

Bathroom before.

Bathroom before.

Bathroom floor installation, partway through. Photos by Holly Tierney-Bedord. All rights reserved.

Bathroom floor installation, partway through. Photos by Holly Tierney-Bedord. All rights reserved.

For information on making your own mini coaster blinds, take a look back at this post from a few weeks ago.

Construction secrets

Flipping my mini house

If you’ve ever worked on an old house, you’ll uncover some secrets. Mini houses are no different. Yesterday I removed the baseboard trim in the living room…

Baseboard trim. Photo by Holly Tierney-Bedord. All rights reserved.

Baseboard trim. Photo by Holly Tierney-Bedord. All rights reserved.

Baseboard trim. Photo by Holly Tierney-Bedord. All rights reserved.

Baseboard trim. Photo by Holly Tierney-Bedord. All rights reserved.

and discovered this:

Trim with notes. Photo by Holly Tierney-Bedord. All rights reserved.

Trim with notes. Photo by Holly Tierney-Bedord. All rights reserved.

As you can see, it’s the hand-written notes about which wall to install the trim on. I thought it was pretty cool to see the notes that someone, a little girl’s dad, I imagine, made to himself as he constructed the house. I had to save that little piece. It’s too special to toss in the garbage.

I’ve also discovered as flooring and wallpaper come out, that my house is definitely made from a kit. You can see how parts are labeled (for instance, “Part F”). That might lessen its appeal to some collectors, but it doesn’t make much of a difference to me.

Once the trim came out, I began fitting some of the new wallpaper. Unlike the wallpaper in the bedroom, I’m crazy about the one for the living room. It has gold in it, feels very Jonathan Adler-ish, and will help tie together all the metallic accents that will be going into the living room. Here’s a sneak peek at it:

Living room wallpaper sneak peek. Photo by Holly Tierney-Bedord. All rights reserved.

Living room wallpaper sneak peek. Photo by Holly Tierney-Bedord. All rights reserved.

Progress on my mini house, as of today

Flipping my mini house

I thought I’d share a few pictures of how the house looks right now. As a reminder, this is how it looked when I received it this summer:

Day 1 of my mini house. Photo by Holly Tierney-Bedord. All rights reserved.

Day 1 of my mini house. Photo by Holly Tierney-Bedord. All rights reserved.

Most of the carpeting, wallpaper, and trim have since been removed. Wood floors have now been installed in the upstairs bedroom, as well as some funky retro wallpaper in the master bedroom. All rooms will be receiving white baseboard trim, but a flatter version than what was originally in the house.

This slideshow requires JavaScript.

A small part of the original kitchen floor remains, thoroughly glued in place. A friend lent me her heatgun yesterday. She thought it might help loosen up the floor. I’ll let you know how that goes.

Inspiration and tiny decor items lurk everywhere

Everyday objects repurposed

When I’m in the creative zone it’s kind of hard to shut it off. At any given time, I have ten (or twenty, or thirty) different projects swimming in my head. From books I’m writing to houses online I’m dreaming of buying to my imaginings of going on Project Runway (even though my sewing talent level is more on par with Threads), I’m always dreaming about my next creative endeavor. Lately my mini dollhouse is on my mind quite a bit and I find inspiration everywhere. Example: What do you see here?

Bodywash. Photo by Holly Tierney-Bedord. All rights reserved.

A.) Some bodywash on a bookshelf

B.) Something out of place. Is that still wet? It might leave a mark. Maybe you should have set it on a coaster or something.

C.) A disposable bottle and a cap that looks like a tiny, modern bowl.

If you said A, you are a normal person. If you said B, you might be a little bit neurotic. If you said C, let’s take a closer look!

Bodywash cap. Photo by Holly Tierney-Bedord. All rights reserved.

Ooh! Look at the lovely curving lines of this bottle cap. And the rich, gold color. If I flipped it over and ripped off the top I’m sure it would look something like this…

Mini modern cap/bowl. Photo by Holly Tierney-Bedord. All rights reservede.

This is going to make a great little holder of mini fruit, mini balls of yarn, mini magazines, mini plants, and other items. What did I tell you? Tiny decor truly can be found anywhere if you simply look a little closer.

Mini modern bed and pom pom accented bedding

Handmade decor for my mini house

Inspired by modern miniature beds like this, I have created a bed for my miniature master bedroom. The frame is made of part of a picture frame and some thumb tacks. The mattress is made of a piece of Styrofoam covered in quilt batting. It is a work in progress. I plan to give it another coat of paint and maybe add a headboard.

The sheets, comforter, and pillows are made from a fabric remnant, a curtain, and some mini pom pom balls. Since the master bedroom is not that big, this bed will be the focal point of the room. You may recognize the LOVE pom pom pillow from a project I started several weeks ago.

Wooden handles turned modern love seat (and don’t forget the tiny newspaper)

Everyday objects repurposed

Since the only furniture I can find is Victorian, I’ve been busy making my own interpretations of mid-century modern furniture. I made this little love seat from two wooden handles, part of an old napkin, and some wooden balls. Let me take you through the process.

It started with some wooden handles I found at the Habitat for Humanity Restore. I’ve determined, at least in Madison, there is no place better to shop for dollhouse decor than hardware stores. The Restore is great because there are tons of tiny trinkets, washers, nuts, bolts, handles, and hinges. All kinds of things to capture a person’s imagination, all for very little money.

Two wooden handles held with tape while the glue dries. Another in case you are confused. Photo by Holly Tierney-Bedord. All rights reserved.

Two wooden handles held with tape while the glue dries. Another in case you are confused. Photo by Holly Tierney-Bedord. All rights reserved.

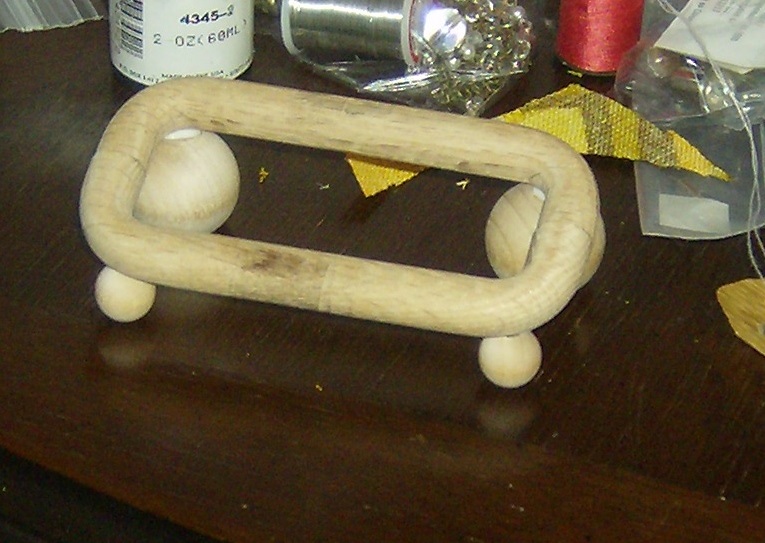
I glued two handles together. Here they are, drying. The other handle is shown in the photo in case you need a little help picturing what these handles looked like before I taped them together.

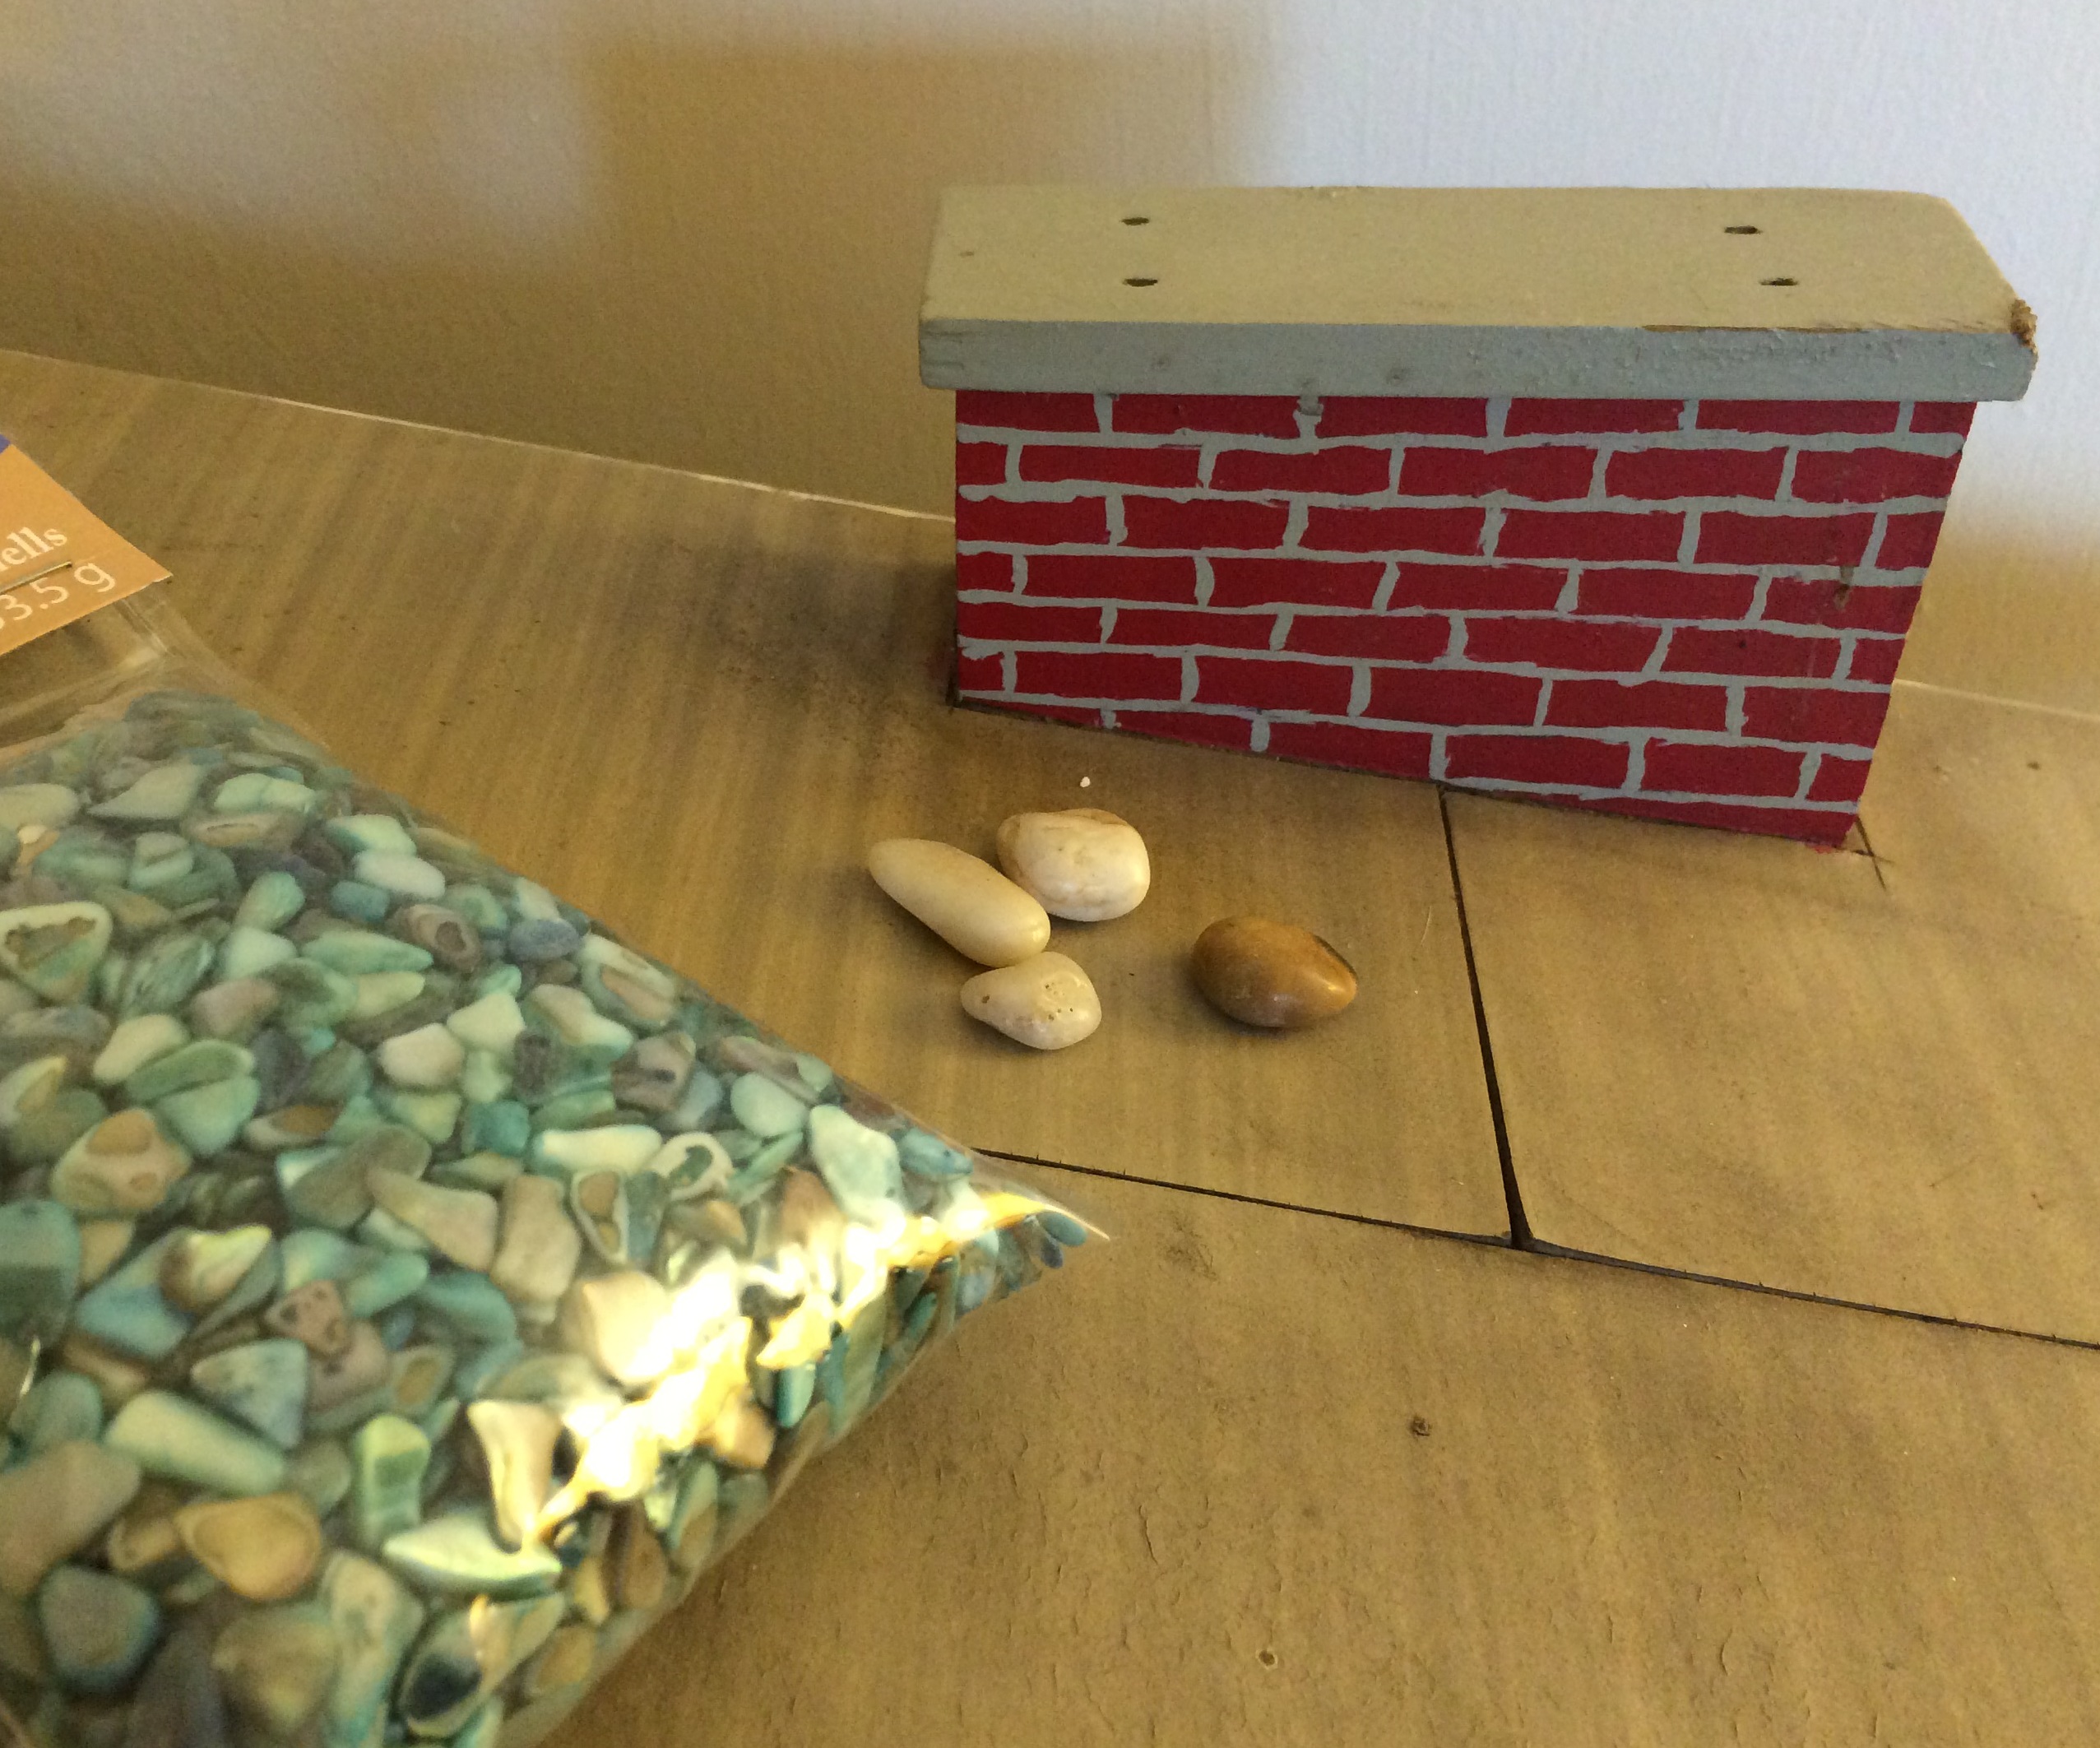
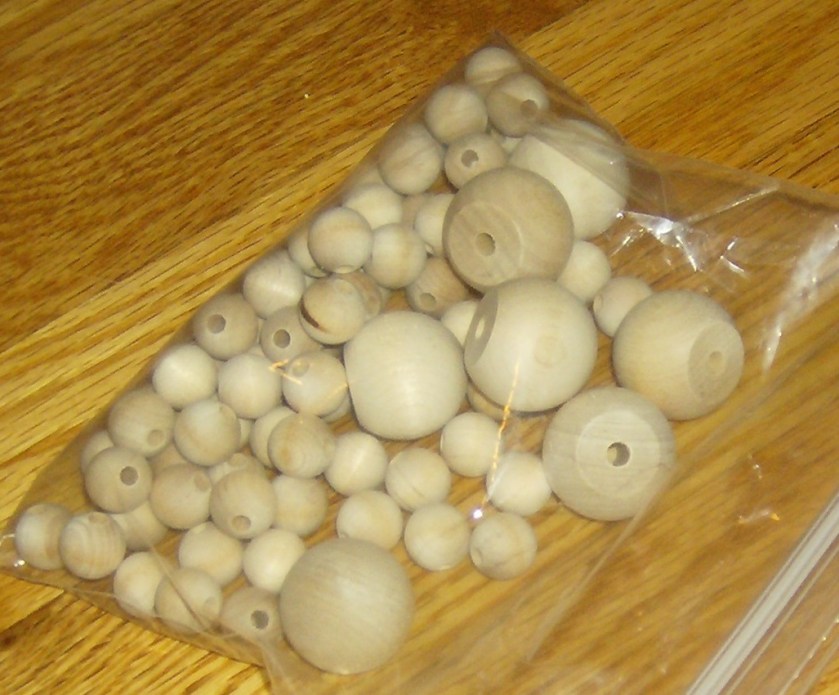
Once they dried I glued some wooden balls to them. The wooden balls are inexpensive. I got this entire bag at a garage sale or thrift shop for very little money:

Photo by Holly Tierney-Bedord. All rights reserved.

Here is an in-progress look with the the glue drying:

Photo by Holly Tierney-Bedord. All rights reserved.

I turned part of a set of napkins into the fabric for my love seat. Here is the in-progress of this step:

Photo by Holly Tierney-Bedord. All rights reserved.

Once the glue dried, I painted the love seat and then wrapped the fabric around the love seat and sewed it into place. I topped it off with a little pillow.

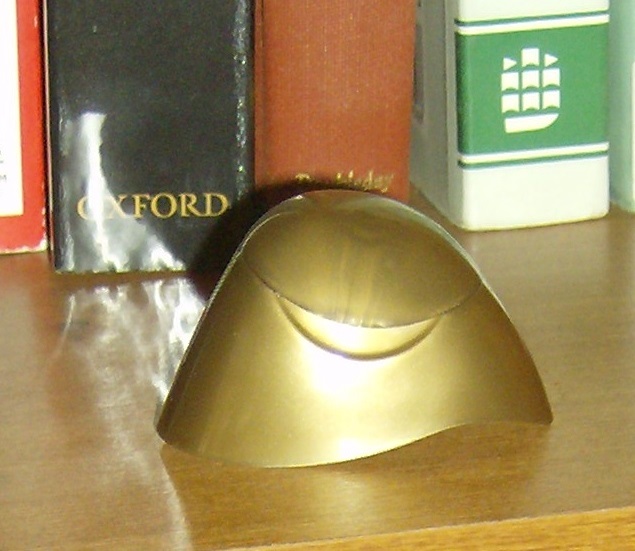
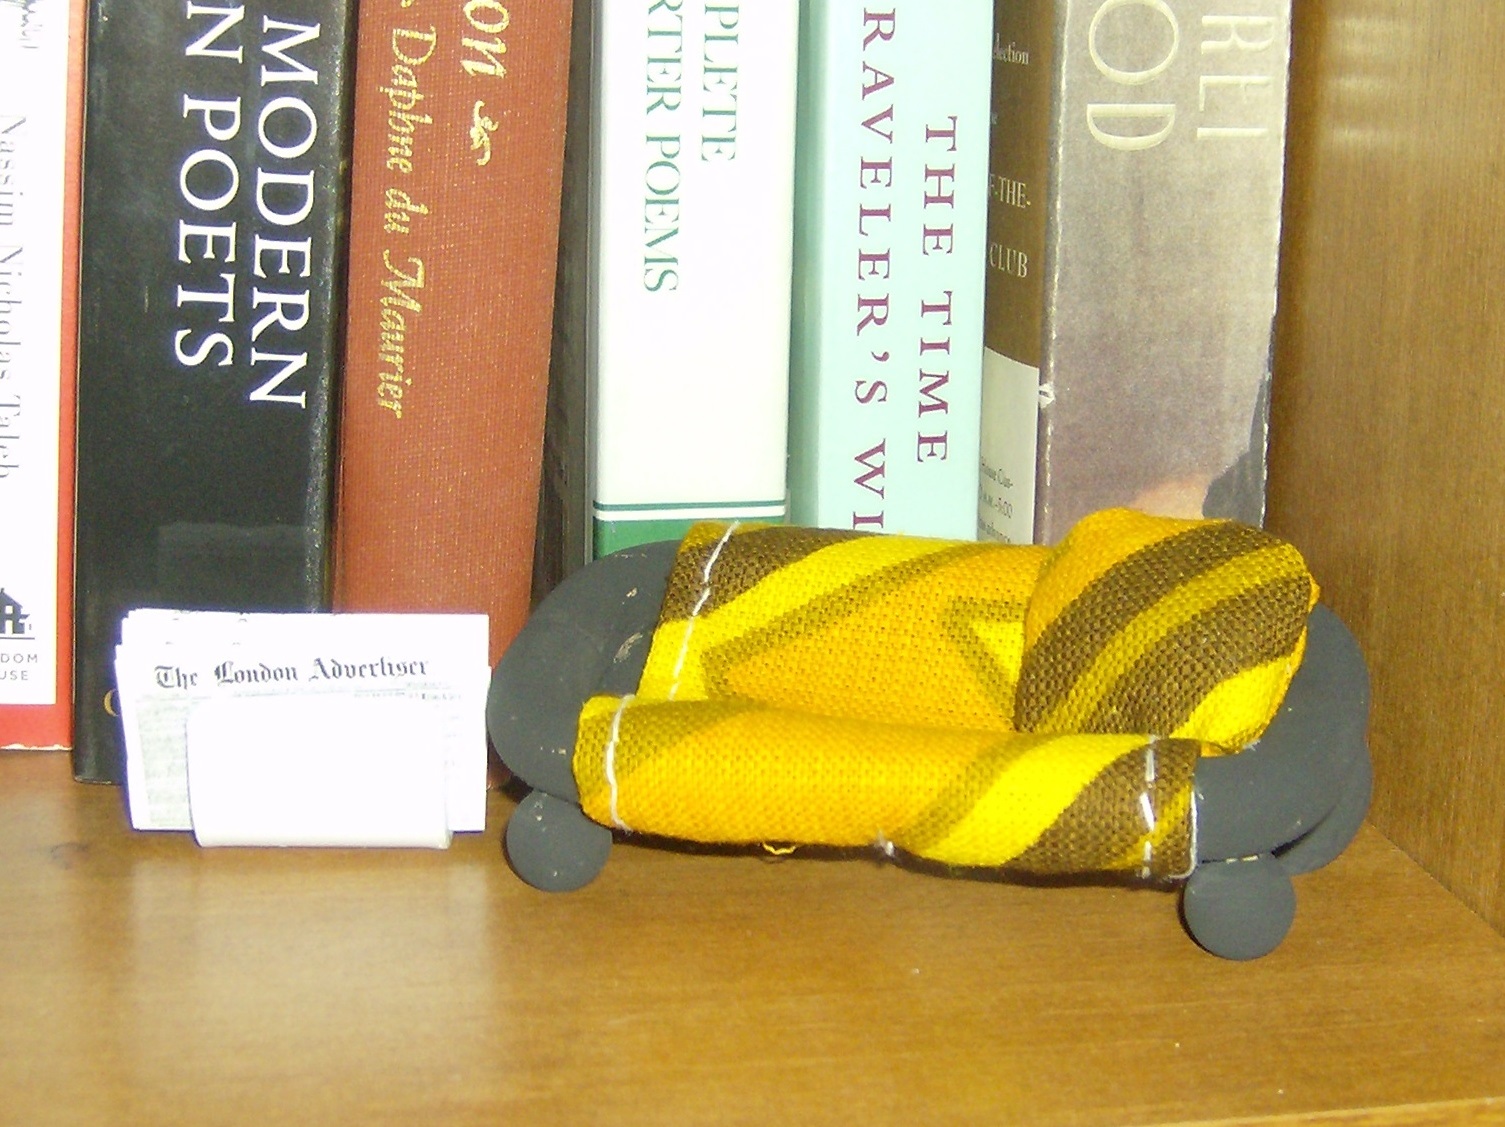
The thing the newspaper sits in is some little metal contraption, also from the Restore. Some kind of bracket or something, I guess. To me it just says Magazine Rack. I bought several bags of these. I have no idea what they are actually used for. I have them in other colors too. For a buck a bag, I couldn’t pass them up.

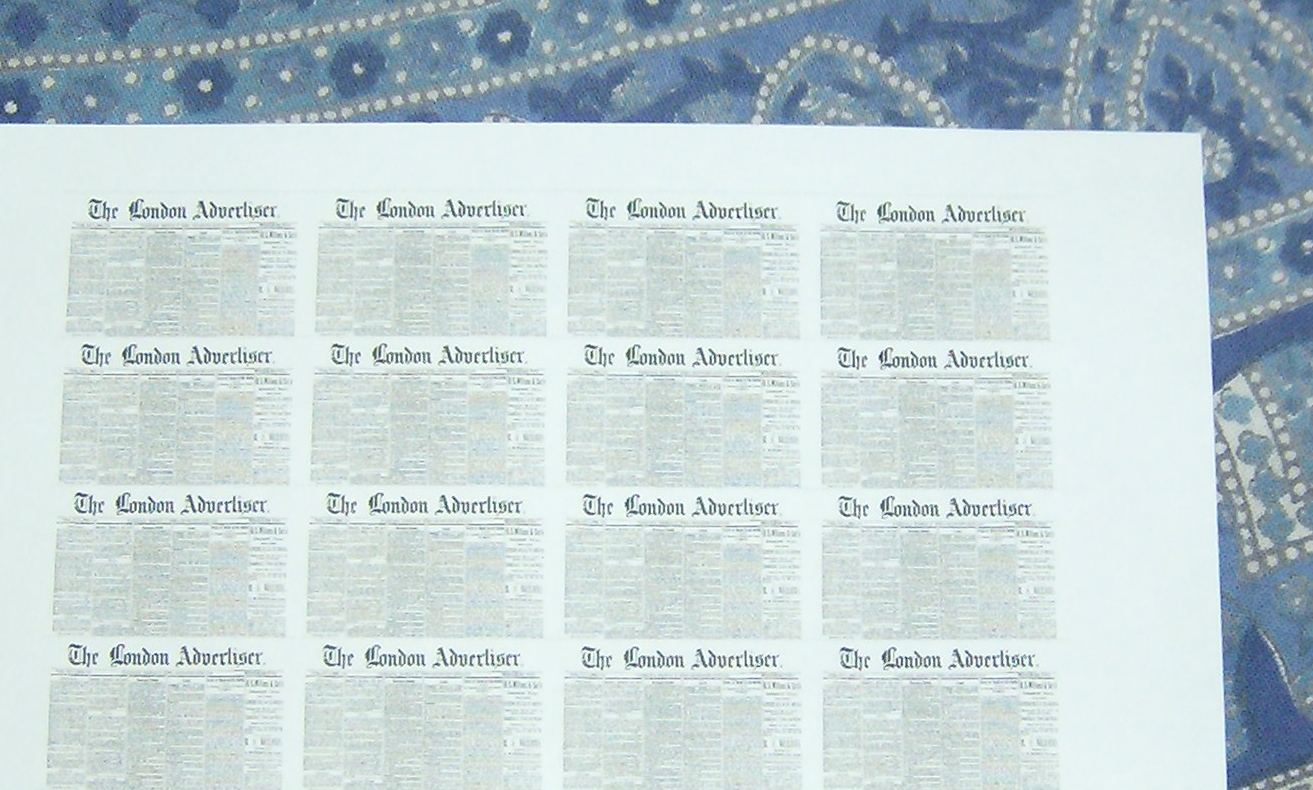
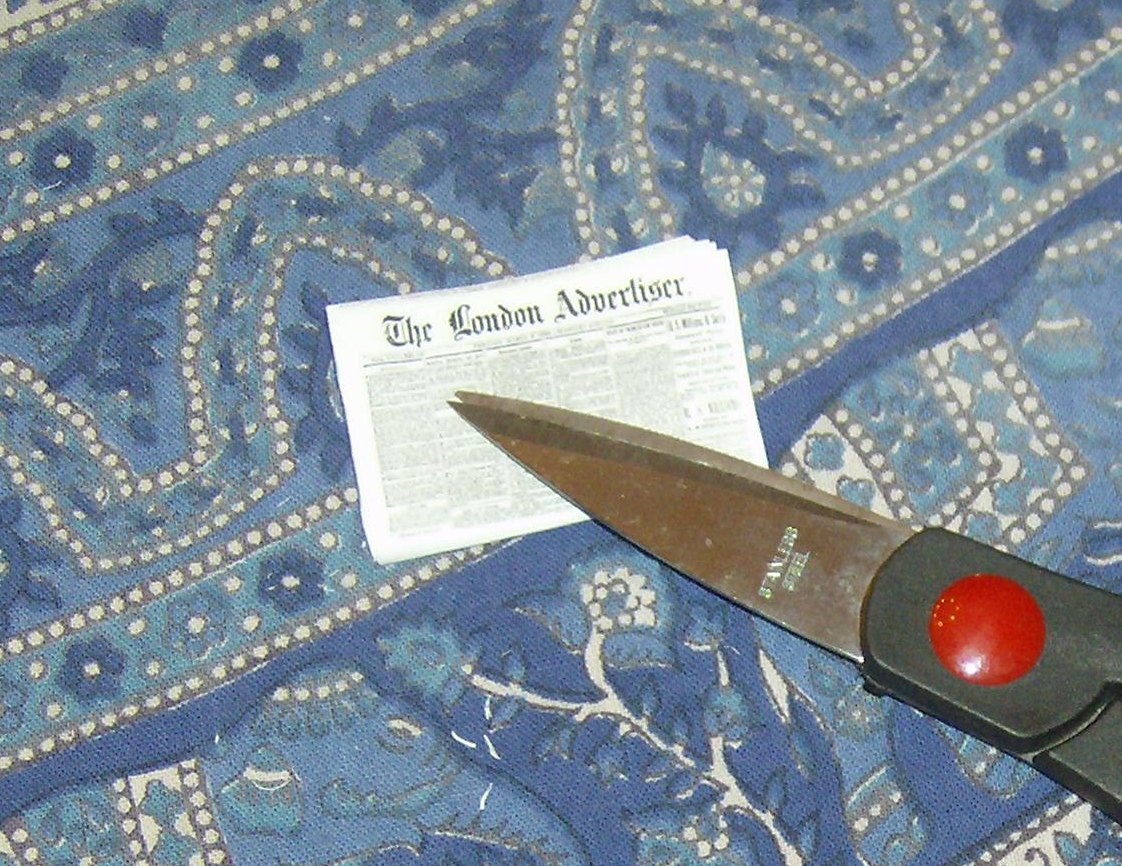
It took me two tries to get the newspaper the right scale. I didn’t worry about the details of printing on both sides of the paper, or having different text inside. I simple pasted in the same image over and over, printed it, cut it out, and put it in the magazine rack. To me, it works fine.

Tiny newspaper. Photo by Holly Tierney-Bedord. All rights reserved.

Mini newspaper by Holly Tierney-Bedord. All rights reserved.

The end result is a cozy place to sit and read the paper:

Tiny love seat and a newspaper to read. Photo by Holly Tierney-Bedord. All rights reserved.

Tiny love seat and a newspaper to read. Photo by Holly Tierney-Bedord. All rights reserved.

A tiny room divider

Handmade decor for my mini house

The bathroom in my mid century dollhouse has no door, so I knew I needed to find a way to give any miniature visitors to the space some privacy without blocking the view too much. My solution is this modern, beaded curtain, made of a rustic twig and four strands of pre-strung beading from the jewelry section of a local craft store (Sharpie shown for scale). The divider will be hung at ceiling height to fill the entire space going into the bathroom:

Boho chic room divider for my mid-century dollhouse. Photo by Holly Tierney-Bedord. All rights reserved.

Boho chic room divider for my mid-century dollhouse. Photo by Holly Tierney-Bedord. All rights reserved.