Trying out paint colors on shingles

Flipping my mini house
Painting dollhouse shingles. Photos by Holly Tierney-Bedord. All rights reserved.

Painting dollhouse shingles. Photos by Holly Tierney-Bedord. All rights reserved.

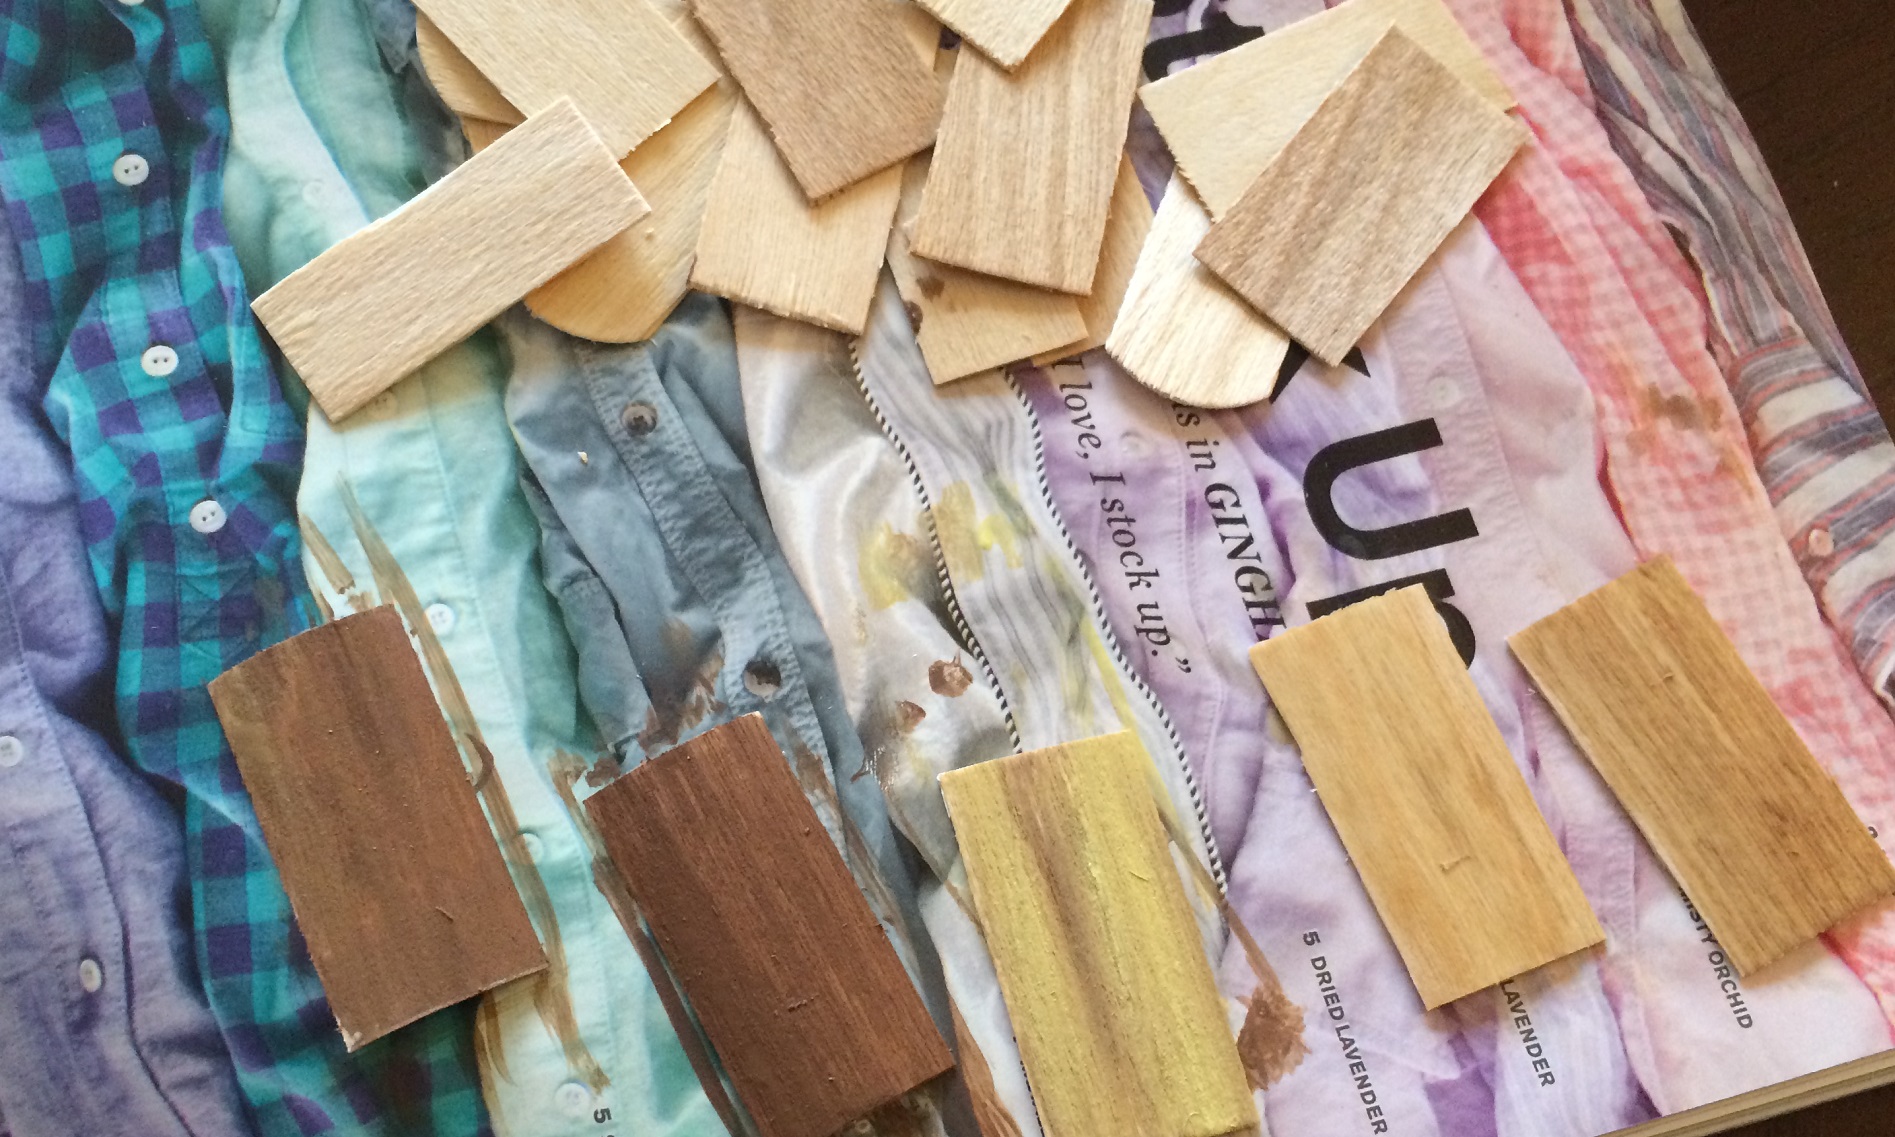
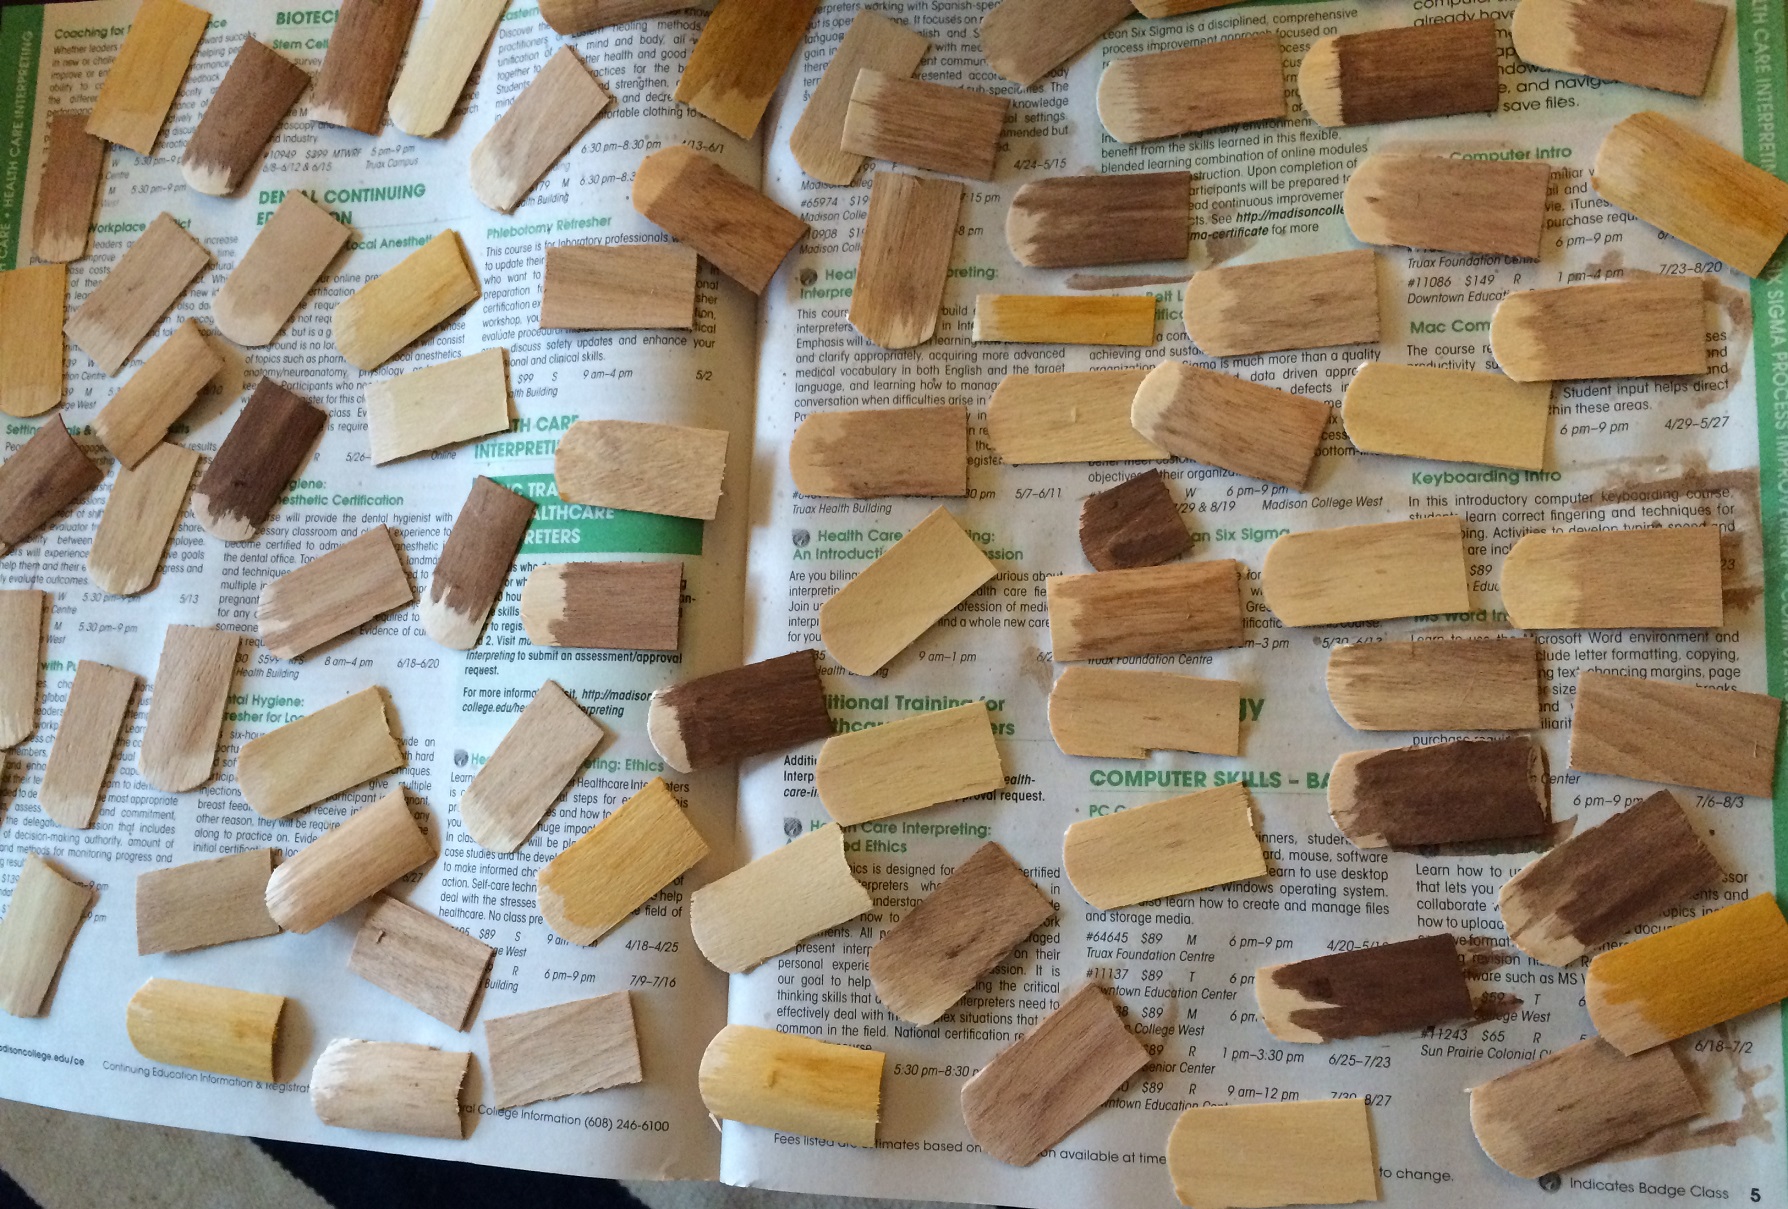
I’m trying out paint colors on shingles. I’ve decided to go with a mix of yellows and browns. You may be tempted to shingle your house and paint it later, since this is much faster than painting shingles individually. I think it’s worth the extra time to paint them individually, varying the color a bit from shingle to shingle, so your finished product looks more realistic.

I will show you where to start applying your shingles soon!

More shingles. The fishscale style are fine for my house -- I'll just keep the round part hidden beneath other layers.

More shingles. The fishscale style are fine for my house — I’ll just keep the round part hidden beneath other layers.

It takes a long time, but this is what television is for. So you can watch it, guilt-free, while accomplishing mindless projects like painting 8 zillion mini shingles.

Have I mentioned how excited I am that the Real Housewives of New York are back? I love them all!!!!! Even Ramona has carved a small place in my heart.

My mini cutting board collection is complete!

Furniture and decor I've purchased

In my real (human scale) home, I have a collection of cutting boards, so naturally my mini house needed one as well. At the miniature show in Chicago, I found three new mini cutting boards, all from seller Dragonfly International. I already have a couple other mini cutting boards, so now my collection is complete. Also, check out the adorable pots and yardstick, also from Dragonfly International!

Regular cutting boards and mini cutting boards. Photos by Holly Tierney-Bedord. All rights reserved.

Regular cutting boards and mini cutting boards. Photos by Holly Tierney-Bedord. All rights reserved.

 
Photos by Holly Tierney-Bedord. All rights reserved.
boards6

minis4

Photos by Holly Tierney-Bedord. All rights reserved.

Photos by Holly Tierney-Bedord. All rights reserved.

The World’s Largest Miniature Show

Miniaturists

This weekend was Chicago International 2015, the world’s largest miniature show, and I was there! I have tons of photos to share, but I’ll start with just one, showcasing these beautiful original paintings by artist Leslie Smith. For more information, click on the photo to be redirected to his website:

Miniature paintings by Leslie Smith.

Miniature paintings by Leslie Smith.

New to FlipThis(Mini)House? Here’s a recap for you!

Flipping my mini house

I’ve always loved dollhouses. Last summer (July, I think) my friend and her husband spotted a mid century dollhouse at a flea market and sent me a text, asking if they should buy it for me. It was just $35, appeared to be pretty solid looking, and had an awesome, unique split level layout.

“Sure!” I said.

A few hours later they were delivering it to me. Here’s how it looked on the day I got it:

Day 1 of my mini house. Photo by Holly Tierney-Bedord. All rights reserved.

Day 1 of my mini house. Photo by Holly Tierney-Bedord. All rights reserved.

Since then I’ve been hard at work creating furniture and accessories from scratch, tweaking store-bought furniture and accessories, and making over everything inside. Here are a few of the accessories and pieces of furniture I created from things like coasters, handles, and yarn that I wove on a potholder loom:

Mini blinds made from a coaster. Photo by Holly Tierney-Bedord. All rights reserved.

Mini blinds made from a coaster.

Tiny love seat and a newspaper to read. Photo by Holly Tierney-Bedord. All rights reserved.

Tiny love seat made from two wooden handles, a mid century cloth napkin, and some small wooden balls. The tiny newspaper rests in a metal doodad from Habitat for Humanity Re-Store.

Photo by Holly Tierney-Bedord. All rights reserved.

A small rug/blanket woven on a potholder loom. Photos by Holly Tierney-Bedord. All rights reserved.

It took me months just to get all the wallpaper and flooring removed!

Here’s a look at some of the rooms in progress:

A look at my mini kitchen and dining area. Photo by Holly Tierney-Bedord. All rights reserved.

A look at my mini kitchen and dining area, in progress.

Living room in progress. Photos by Holly Tierney-Bedord. All rights reserved.

Living room in progress.

And now here’s a look at some of the rooms today:

Trying out furniture and decor in the living room. Photo by Holly Tierney-Bedord. All rights reserved.

Trying out furniture and decor in the living room.

Kitchen "after"

This kitchen is coming along! All photos by Holly Tierney-Bedord. All rights reserved.

For all the details, and to see the final unveiling which will hopefully happen in the later spring/summer, follow me here on WordPress or on the Flip This Mini House Facebook page.

Sometimes perfect is the last thing you want to be

Tweaking store-bought dollhouse furniture

As I mentioned in my previous post, my mom picked up some adorable white cupboards for my kitchen. Here they are in place, in my semi-completed kitchen:

White cupboards in my mini kitchen. Photos by Holly Tierney-Bedord. All rights reserved.

White cupboards in my mini kitchen. Photos by Holly Tierney-Bedord. All rights reserved.

They’re a little taller than the window, which is unfortunate but not a huge deal.

I added the refrigerator into the mix, even though it needs some more coats of paint, but left out the stove since the paint was still really wet. It looks very cute, but not exactly mid century, not exactly modern, and not exactly personality-filled like I want my house to be.

I decided to make some small changes. I purchased some cool little gold buttons:

Tiny gold buttons.

Tiny gold buttons.

…and some woodgrain decorative tape, and gave the drawers and doors a makeover. Here’s a look at the “during” portion of the makeover:

Giving my cupboards a makeover

Giving my cupboards a makeover

The great thing about this makeover is that the tape can easily be removed without taking an paint off, and the original brass knobs can be stuck back in place. However, I decided I liked it and felt it was a better fit with the rest of the decor in the house, so I updated everything. Here’s a look at the “after” version:

Kitchen "after"

Kitchen “after”

As you can see, there are plenty of details still needing to be fixed, from paint on the window that needs to be removed, to trim that still needs to be installed. It will all come together soon though. If this new look seems a little weird to you, just wait. When you see the finished product, it will all make sense!

Some small changes to some (small) appliances

Tweaking store-bought dollhouse furniture

The refrigerator and stove I plan to use in my house were a little too small and an icky shade of yellowish beige. After several unsuccessful looks at eBay and other online miniature shopping sites, I decided to do what I could to improve the appearance of them.

I didn’t mind so much that they were a little small — to me, it gave the refrigerator a bit of a Smeg feel to it, and the stove reminded me of a cute little 1960’s gas stove I had in an apartment long ago (my favorite apartment ever). But the stove in particular was just too small to work with the cute little set of cupboards my mom picked up for me, which I am firmly committed to using, so I decided to do what I could to make the stove a little bigger.

Stove before. Photos by Holly Tierney-Bedord. All rights reserved.

Stove before. Photos by Holly Tierney-Bedord. All rights reserved.

Adding coats of paint to the stove and refrigerator.

After putting a couple of coats of paint on each, I added some feet to the stove (tiles, actually).

Stove with feet added.

Stove with feet added.

The tiles/feet overhang the back of the stove, because I’m going to build up the back of it with some cork coasters. These little feet bring it up to the same height as my countertops.

Two cork coasters, painted white, trimmed to size, and glued to the back of my little stove.

Two cork coasters, painted white, trimmed to size, and glued to the back of my little stove.

These coasters not only give the stove a top portion for knobs, but they also make it so the stove is the same approximate depth of my counter tops.

I added some tape to round off the border of the stove, some more coats of paint, and some black brads as tiny control knobs.

Almost done!

Almost done!

My stove is almost done! It needs another coat of paint and some of the details worked out, but I’m much happier with the color, size, and general appearance. Photos of it in the kitchen coming soon!

Floors in the kitchen and dining room

Flipping my mini house

My kitchen floor grouting is complete and my dining room floor has been installed! Here’s a behind-the-scenes look at the unglamorous process, with some books, chip clips, and wedged-in tools all doing their part to make sure the floor stays nice and smooth!

Installing dollhouse floors. Photo by Holly Tierney-Bedord. All rights reserved.

Kitchen tiles and wallpaper

Flipping my mini house

I think I’ve finally chosen a look for the kitchen.

It hasn’t been easy! Kitchens are so important. I really wanted a mainly white kitchen with orange or yellow Orly Kiely-esque wallpaper. Finally I decided it wasn’t realistically going to happen, no matter how many times I sifted through the scrapbook paper at my local craft store. So this is what I came up with:

Tiles and wallpaper for my mini kitchen. Photo by Holly Tierney-Bedord. All rights reserved.

Tiles and wallpaper for my mini kitchen. Photo by Holly Tierney-Bedord. All rights reserved.

I’m not sure about the multicolored tiles. I’ll have to put some in place and see what I think. Stay tuned!